Install the 7 different Desktop Environment with XRDP in single ubuntu server.
Prerequisites
Before you begin, ensure you have:
- An Ubuntu Server instance (e.g., Ubuntu 20.04 LTS or 22.04 LTS) running in the cloud.
- SSH access to the server with a user that has
sudoprivileges.
The Linux GUI Landscape—Desktop Environments
Linux DEs cater to every taste, whether you prioritize eye-candy, low resource usage, or a classic, familiar layout. Below are the top contenders, including the popular KDE Plasma (which Kubuntu uses) and many others.
The Big Four: Power, Style, and Efficiency
| Desktop Environment | Focus & Key Feature | Best Suited For |
|---|---|---|
| KDE Plasma | Power & Customization. Highly modern, feature-rich, and visually stunning. Offers deep control over every aspect of the desktop. | Power users, Windows switchers, and anyone who loves to tinker and customize their UI. |
| GNOME | Simplicity & Modernity. A clean, minimalist interface focused on keyboard shortcuts and the “Activities” overview. | Users seeking a modern, distraction-free workflow, often found as the default on Ubuntu and Fedora. |
| Cinnamon | Traditional Layout & Stability. A classic, comfortable desktop that closely mimics the Windows 7/XP experience. | Beginners and Windows switchers who want a familiar, immediate, and highly stable experience (default on Linux Mint). |
| XFCE | Lightweight & Fast. Extremely resource-friendly and highly stable. It sacrifices some modern visual flair for pure speed. | Older hardware, virtual machines (VMs), or users prioritizing speed and low RAM/CPU usage. |
The Specialized & Lightweight Options
- MATE: A continuation of the classic GNOME 2 desktop. It’s stable, traditional, and lightweight, ideal for users nostalgic for older Linux versions.
- LXQt: The combination of the lightweight LXDE and the Qt framework. It is one of the absolute lightest DEs, perfect for very low-power devices.
- Pantheon: The elegant desktop environment from Elementary OS. Known for its curated, macOS-like aesthetic and focus on polished, integrated applications.
- Budgie: Developed by the Solus project, it balances elegance and modern features with a focus on simplicity. It features a unique sidebar called Raven for notifications and settings.
- Deepin Desktop Environment (DDE): Highly praised for its stunning, animated design and unique control center sidebar, often compared to macOS in terms of visual polish.
Install XRDP and XFCE
First, we’ll update the system, install the necessary XRDP service, and then install the XFCE desktop environment.
-
Update your system packages:
sudo apt update sudo apt upgrade -y -
Install the XRDP service:
sudo apt install xrdp -y -
Install the Desktop Environment and Configure: Configure the user’s session: Create or edit the
.xsessionfile in the home directory of the user you will use to connect. This file tells XRDP which desktop to launch.
- Install XFCE DEs:
sudo apt install xfce4 -y
sudo apt install xubuntu-desktop -y # The full Xubuntu experience.
echo xfce4-session > ~/.xsession
echo startxfce4 > ~/.xsession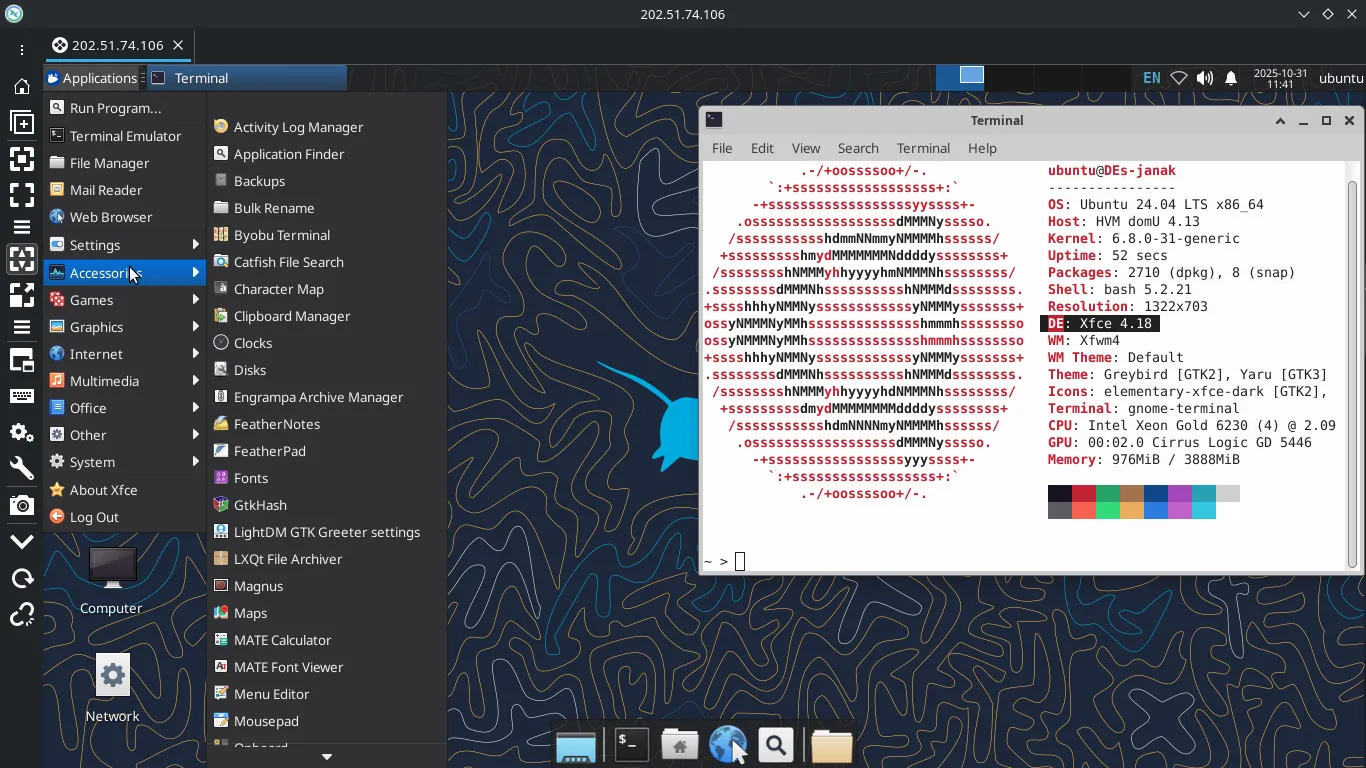
- Install LXQt DEs:
sudo apt install lxqt -y # The full Lubuntu (now LXQt-based) experience.
sudo apt install lubuntu-desktop -y # The full Lubuntu (now LXQt-based) experience.
echo startlxqt > ~/.xsession
- Install MATE DEs:
sudo apt install ubuntu-mate-desktop -y # The full Ubuntu MATE experience.
sudo apt install mate-desktop-environment -y # A more standard MATE install.
sudo apt install mate-session-manager -y # Installs the core session manager.
echo mate-session > ~/.xsession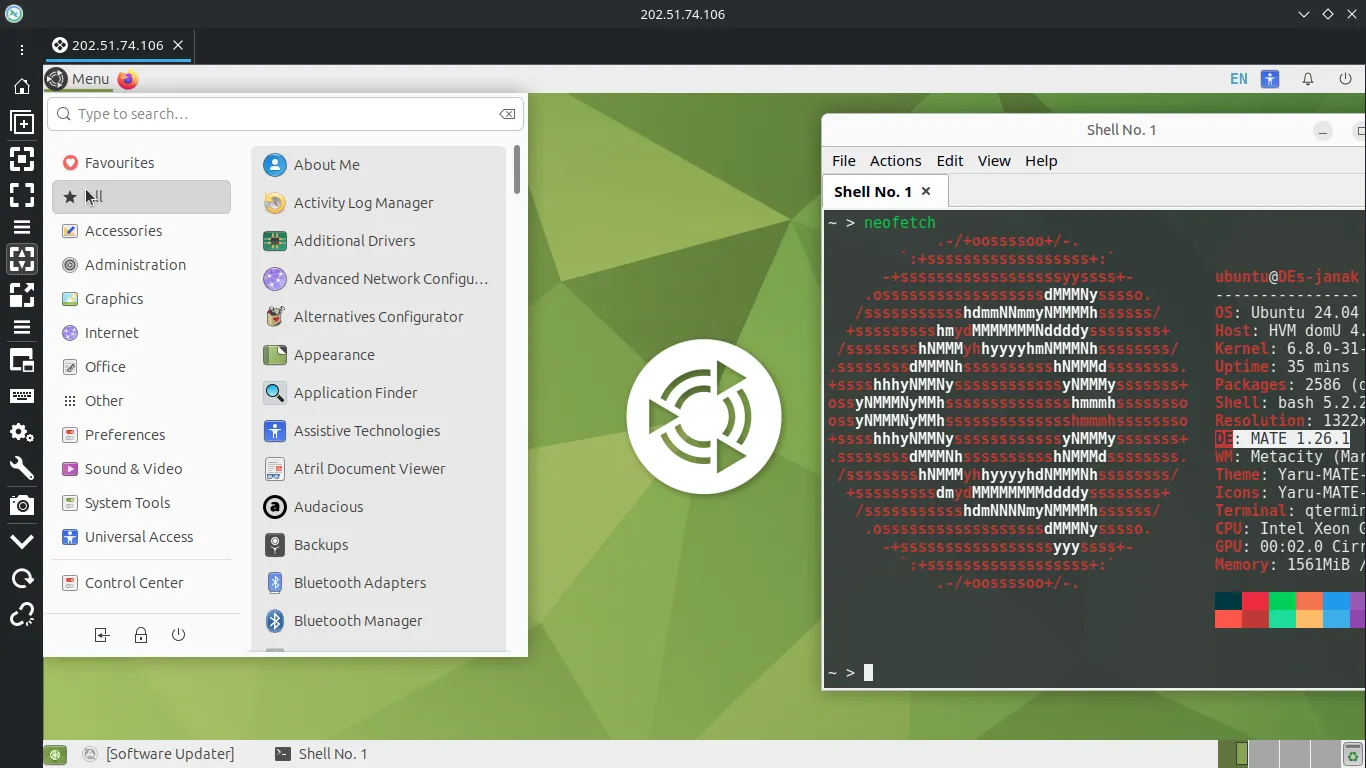
- Install Cinnamon DEs:
sudo apt install cinnamon-desktop-environment -y # Standard Cinnamon installation.
sudo apt install cinnamon -y # Installs the core Cinnamon package.
echo cinnamon-session > ~/.xsession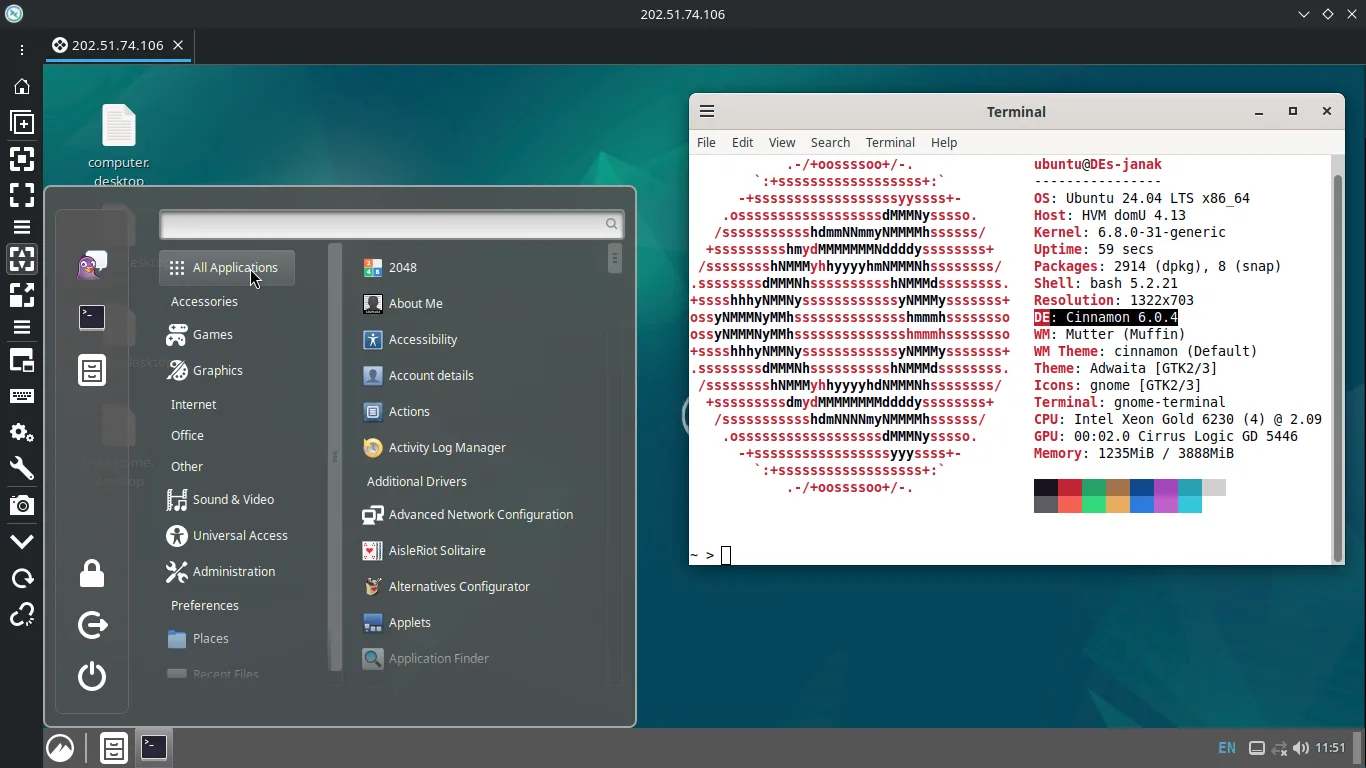
- Install Enlightenment (E) DEs:
sudo apt install enlightenment -y # A unique, lightweight, and fast DE/WM.echo enlightenment_start > ~/.xsession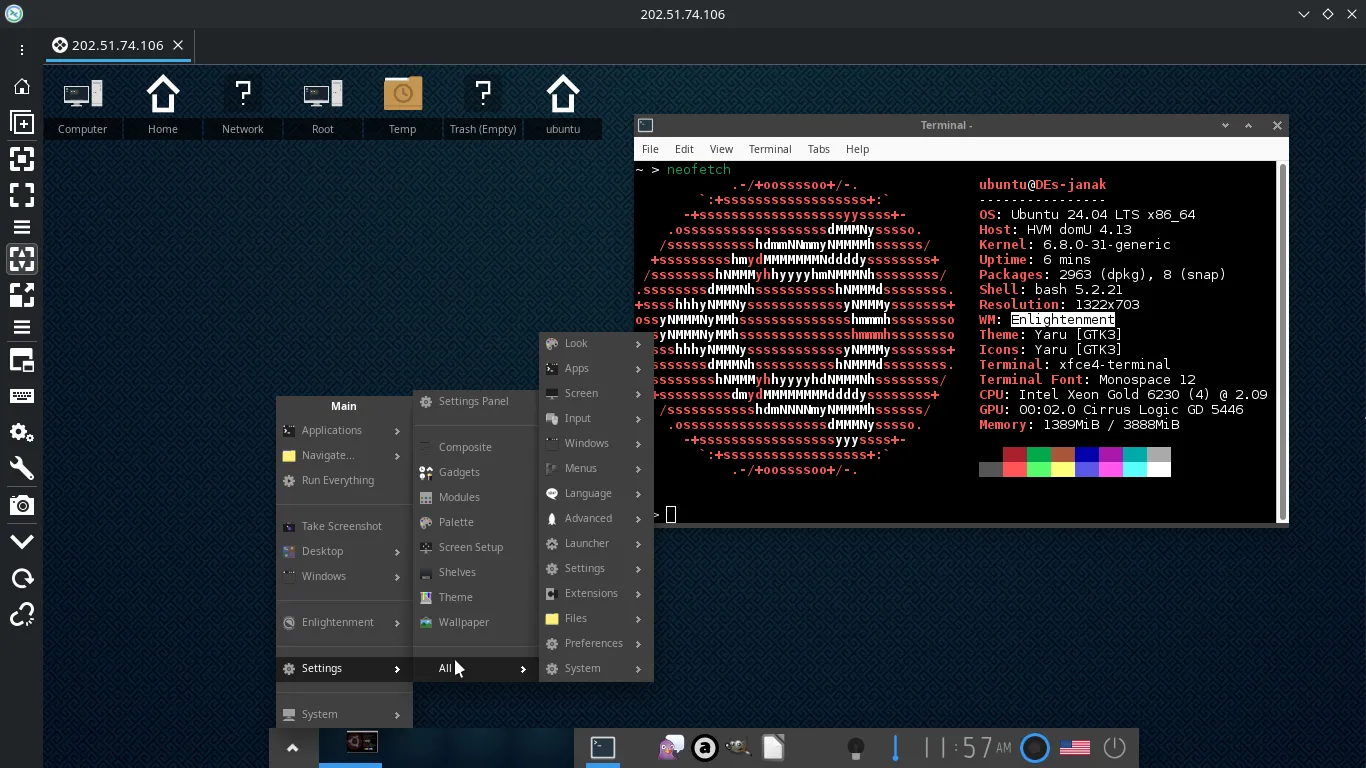
- Install Gnome DEs:
sudo apt install ubuntu-desktop -y # The full, default Ubuntu experience.
sudo apt install gnome-session # Installs the core session manager.
sudo apt install gnome-core # Installs a minimal GNOME experience.
echo gnome-session > ~/.xsession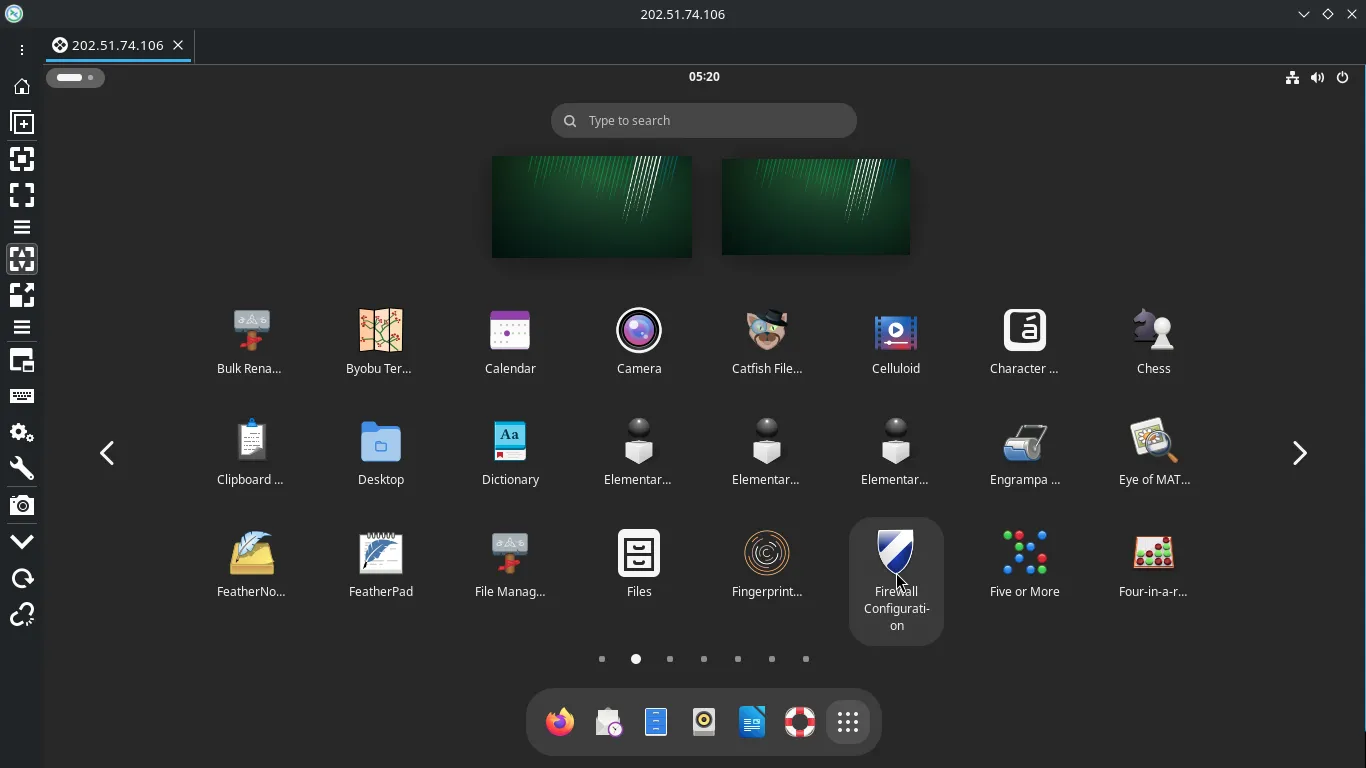
- Install KDE Plasma DEs:
sudo apt install kubuntu-desktop -y # The full Kubuntu experience.
sudo apt install plasma-desktop # Installs a more basic version of Plasma.
sudo apt install gkde-plasma-desktop # Minimal
echo startplasma-x11 > ~/.xsession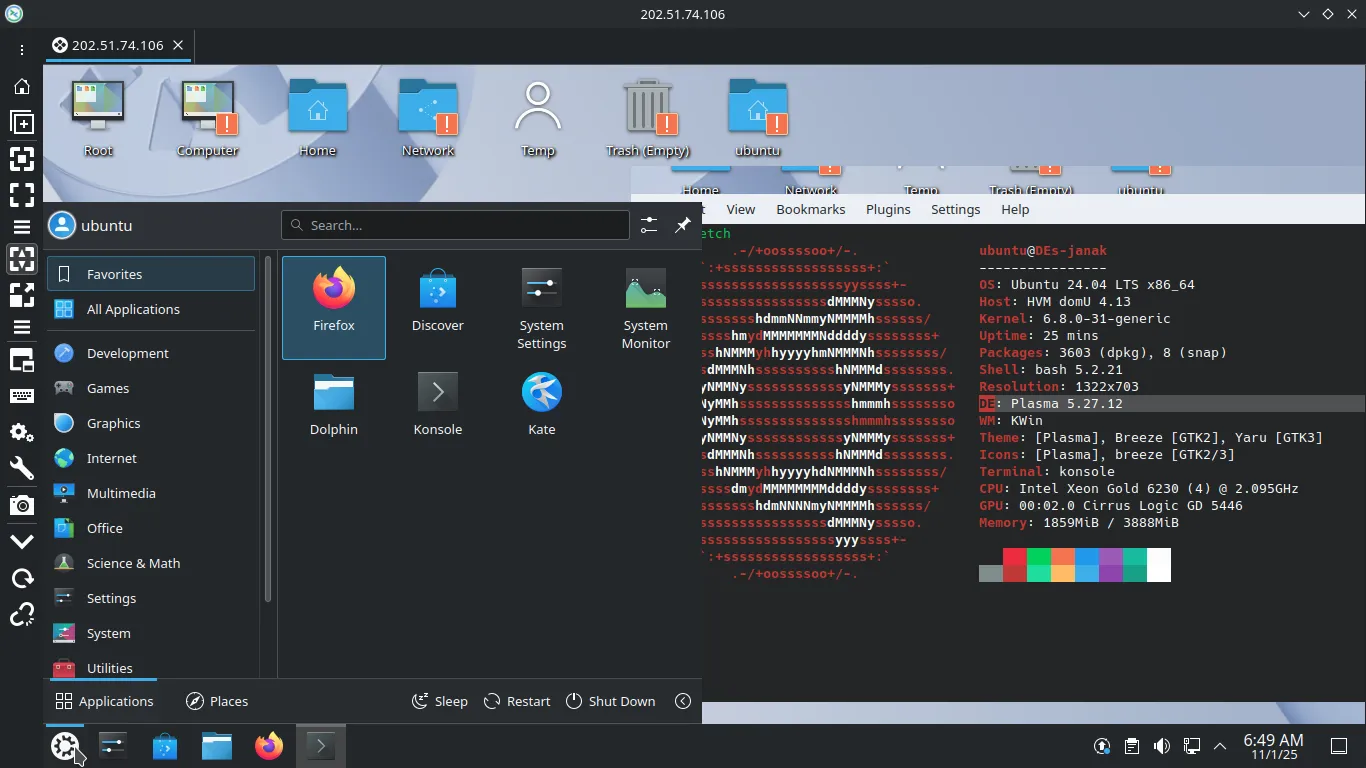
-
Set correct permissions for the
.xsessionfile:sudo chown -R $USER:$USER /home/$USER/.xsession chmod +x ~/.xsession -
Add the XRDP user to the
ssl-certgroup (essential for secure operation):sudo adduser xrdp ssl-cert -
Restart the XRDP service to load the new configuration:
sudo systemctl restart xrdp -
Check the Status of
display-manager.serviceSystemd uses a generic service unit named
display-manager.servicewhich is a symbolic link to the actual Display Manager service installed (e.g.,gdm.service,lightdm.service, orsddm.service).Run this command to see which DM is active:
systemctl status display-manager.service pgrep -l -f "(gdm|lightdm|sddm|kdm|lxdm)" -
Set the system to boot into graphical mode by default
After installation, your server is still set to boot into command-line mode (multi-user.target). We need to switch it to boot into the graphical mode (graphical.target).
sudo systemctl set-default graphical.targetConfigure the Firewall
The default RDP port is 3389. You must open this port in your server’s firewall to allow incoming connections.
If you are using UFW (Uncomplicated Firewall), run this command:
sudo ufw allow 3389/tcp
sudo ufw enable
sudo ufw reload(Note: If your cloud provider uses its own firewall rules (Security Groups), you must also ensure port 3389 is open there.)
Connect with an RDP Client
You are now ready to connect! Use your favorite RDP client on your local machine (Windows Remote Desktop Connection, Remmina, KRDC, Microsoft Remote Desktop for Mac, etc.).
| Setting | Value |
|---|---|
| Computer/Server | Your server’s public IP address or hostname. |
| Port | 3389 (default RDP port). |
| Session | Leave as default or select “Xorg” if prompted. |
| Username & Password | The credentials of the Ubuntu user you configured. |
You should now be presented with a responsive, high-performance XFCE desktop, giving you a full graphical interface on your cloud server without the resource overhead!
Reference
- Desktop Environment Installation and Session Commands (Ubuntu/Debian)
| Installation Command | Desktop Environment (DE) | ~/.xsession Command (Generally Reliable) | Notes |
|---|---|---|---|
sudo apt install ubuntu-desktop | GNOME (Standard Ubuntu) | exec gnome-session | The full, default Ubuntu experience. |
sudo apt install gnome-session | GNOME (Core Session) | exec gnome-session | Installs the core session manager. |
sudo apt install gnome-core | GNOME (Minimal Core) | exec gnome-session | Installs a minimal GNOME experience. |
sudo apt install kubuntu-desktop | KDE Plasma (Full Kubuntu) | exec startplasma-x11 | The full Kubuntu experience. |
sudo apt install plasma-desktop | KDE Plasma (Minimal) | exec startplasma-x11 | Installs a more basic version of Plasma. |
sudo apt install kde-plasma-desktop | KDE Plasma (Minimal) | exec startplasma-x11 | Similar to plasma-desktop. |
sudo apt install xubuntu-desktop | Xfce (Full Xubuntu) | exec startxfce4 or exec xfce4-session | The full Xubuntu experience. startxfce4 is usually preferred. |
sudo apt install mate-desktop-environment | MATE (Standard) | exec mate-session | A more standard MATE install. |
sudo apt install ubuntu-mate-desktop | MATE (Full Ubuntu MATE) | exec mate-session | The full Ubuntu MATE experience. |
sudo apt install mate-session-manager | MATE (Core Session) | exec mate-session | Installs the core session manager. |
sudo apt install lubuntu-desktop | LXQt (Full Lubuntu) | exec startlxqt | The full Lubuntu (now LXQt-based) experience. |
sudo apt install lxqt | LXQt (Minimal) | exec startlxqt | Installs the base LXQt environment. |
sudo apt install cinnamon-desktop-environment | Cinnamon (Standard) | exec cinnamon-session | Standard Cinnamon installation. |
sudo apt install enlightenment | Enlightenment (E) | exec enlightenment_start | A unique, lightweight, and fast DE/WM. |
sudo apt install cinnamon | Cinnamon (Core) | exec cinnamon-session | Installs the core Cinnamon package. |
sudo apt install budgie-desktop | Budgie | exec budgie-session | Used by Ubuntu Budgie. |
sudo apt install i3 | i3 (Tiling Window Manager) | exec i3 | A very popular manual window manager (not a full DE). |
sudo apt install openbox | Openbox (Stacking Window Manager) | exec openbox-session | A highly configurable, minimal stacking window manager. |
Learn More:
💻 ~/.xinitrc (X-Init RC)
- Usage Context: Primarily used when you start the X session manually from a text console using the command
startx(which is a wrapper script forxinit). - Purpose: It’s the startup script for the
xinitprogram. - Contents: It’s responsible for setting up the basic X environment (like resources, keyboard settings) and, critically, launching the core component of your graphical session, typically a Window Manager (WM) or a Desktop Environment (DE).
- Execution Flow:
- You log in to a text console.
- You run the command
startx. startxcallsxinit, which looks for~/.xinitrc.- The script runs. The X session remains active as long as the last command in
~/.xinitrcis running. This last command is usually the WM/DE, often started withexec(e.g.,exec startxfce4orexec i3). - When the WM/DE exits, the script terminates, and
xinitkills the X server, returning you to the text console.
🖥️ ~/.xsession (X-Session)
- Usage Context: Primarily used when you log in through a Display Manager (DM), such as GDM, LightDM, SDDM, or KDM (the graphical login screen).
- Purpose: It’s the startup script used by the display manager to initialize the user’s custom graphical session.
- Contents: It serves a similar role to
~/.xinitrc—it sets up the environment and launches the session’s Window Manager or Desktop Environment. However, on some distributions (like Debian), the system’sXsessionscript may be designed to be a unified startup point that handles bothstartxand DM logins, often by sourcing the user’s~/.xsessionfile. - Execution Flow:
- The Display Manager is already running and shows a graphical login screen.
- You log in.
- The Display Manager runs a system-wide
/etc/X11/Xsessionscript, which then looks for and executes or sources the user’s~/.xsessionfile. - The script launches the WM/DE.
🎯 Summary Table
| Feature | ~/.xinitrc | ~/.xsession |
|---|---|---|
| Trigger | Manual start via xinit or startx. | Graphical login via a Display Manager (DM). |
| Core Program | xinit (or startx wrapper). | System-wide Xsession script (called by the DM). |
| Typical Use | Custom, minimal, or tiling Window Manager setups. | Desktop Environment (DE) or custom sessions via DM. |
Note: On modern systems and in many distributions (especially Debian-based ones), the system-wide /etc/X11/xinit/xinitrc file often calls the system-wide /etc/X11/Xsession script. This convergence is an attempt to unify the startup process so that your graphical environment is consistent whether you use startx or a Display Manager, often relying more heavily on ~/.xsession for user customization.
1. Check Current Display Manager
You can usually check the currently configured Display Manager using one of these commands:
- Systemd-based systems:
This command will show which service is symlinked tosystemctl status display-manager.servicedisplay-manager.serviceand its status. - Debian/Ubuntu systems:
This file often contains the path to the executable of the currently set default DM.cat /etc/X11/default-display-manager
2. Change the Default Display Manager
The method for changing the DM depends on your Linux distribution:
A. Debian/Ubuntu-based Systems (using dpkg-reconfigure)
If you have multiple DMs installed (e.g., gdm3, lightdm, sddm), you can use the dpkg-reconfigure utility, which will prompt you to select the default one from a list:
- Run the command, replacing
gdm3with the name of any installed Display Manager package:sudo dpkg-reconfigure gdm3- This will bring up a configuration screen where you can select your preferred DM (e.g., LightDM, SDDM) using the arrow keys and pressing Enter.
- Reboot the system for the change to take effect:
sudo reboot
B. Systemd-based Systems (using systemctl for generic DMs)
On distributions that primarily rely on systemd services (like Arch, Fedora, etc.), you manage the default DM by disabling the old service and enabling the new one. This assumes the new DM is already installed.
- Disable the currently enabled DM service (e.g., GDM):
sudo systemctl disable gdm.service - Enable the new DM service (e.g., LightDM or SDDM):
sudo systemctl enable lightdm.service # OR sudo systemctl enable sddm.service- You might need to use the
--forceflag if an existingdisplay-manager.servicesymlink needs to be overridden.
- You might need to use the
- Start the new DM, or reboot the system:
sudo systemctl start lightdm.service
# OR
sudo reboot
The Display Manager you choose will typically be responsible for presenting the graphical login screen and launching the selected Desktop Environment (DE), which is why the terms are sometimes confused. Common DMs include GDM (for GNOME), LightDM (for Xfce, LXDE, Unity), and SDDM (for KDE Plasma, LXQt).
Comprehensive List of Linux GUI Desktop Environments
| Desktop Environment | Primary Focus | Best For | Typical Look/Feel |
|---|---|---|---|
| KDE Plasma (e.g., Kubuntu) | Customization & Features | Users who want maximum control, a modern feel, and a massive feature set. | Highly modern, Windows-like, with advanced widgets and visual effects. |
| GNOME (e.g., Ubuntu, Fedora) | Modern Simplicity & Productivity | Users seeking a clean, uncluttered, and modern workflow with minimal distractions. | Clean, touch-friendly, uses a unique “Activities” screen for window management. |
| XFCE (e.g., Xubuntu) | Lightweight & Stable | Older hardware, virtual machines, or users prioritizing speed and low resource use. | Traditional (panel, menu), but highly efficient and theme-able. |
| Cinnamon (e.g., Linux Mint) | Traditional & User-Friendly | Windows switchers who want a familiar, classic desktop metaphor that is stable. | Classic Windows-like panel at the bottom with a familiar menu structure. |
| MATE (e.g., Ubuntu MATE) | Traditional GNOME 2 Fork | Users who prefer the older, more efficient, and classic desktop layout of GNOME 2. | Classic panel structure, focus on stability and lower resource usage than GNOME 3. |
| LXQt (e.g., Lubuntu) | Ultra-Lightweight | Very low-spec systems, netbooks, or users who need the absolute minimum of resources. | Basic, fast, and simple layout built on the Qt framework. |
| Budgie (e.g., Ubuntu Budgie) | Modern Simplicity & Elegance | Users who want a clean, simple, and aesthetically pleasing desktop with a unique sidebar (Raven). | Modern, simple, and minimalist design; highly focused on user experience. |
| Pantheon (e.g., Elementary OS) | Aesthetics & Simplicity | Users seeking a highly curated, macOS-like experience with a focus on simple apps. | Extremely elegant, clean, and opinionated design; not highly customizable. |
| Deepin Desktop Environment (DDE) | Visual Appeal | Users prioritizing a highly modern, polished, and animated user interface. | Stunning visuals, unique control center sidebar, and a prominent dock. |
| Enlightenment (E) | Speed & Minimalism | Power users and those on extremely limited hardware who still want some visual flair. | Minimalist, but highly configurable with unique animations and effects. |
Changing the default Display Manager (DM) in Linux, such as switching from GDM to LightDM or SDDM, is typically done via the command line, especially on systems using systemd or those based on Debian/Ubuntu.
Change the Default Display Manager
The method for changing the DM depends on your Linux distribution:
A. Debian/Ubuntu-based Systems (using dpkg-reconfigure)
If you have multiple DMs installed (e.g., gdm3, lightdm, sddm), you can use the dpkg-reconfigure utility, which will prompt you to select the default one from a list:
- Run the command, replacing
gdm3with the name of any installed Display Manager package:sudo dpkg-reconfigure gdm3- This will bring up a configuration screen where you can select your preferred DM (e.g., LightDM, SDDM) using the arrow keys and pressing Enter.
- Reboot the system for the change to take effect:
sudo reboot
B. Systemd-based Systems (using systemctl for generic DMs)
On distributions that primarily rely on systemd services (like Arch, Fedora, etc.), you manage the default DM by disabling the old service and enabling the new one. This assumes the new DM is already installed.
- Disable the currently enabled DM service (e.g., GDM):
sudo systemctl disable gdm.service - Enable the new DM service (e.g., LightDM or SDDM):
sudo systemctl enable lightdm.service # OR sudo systemctl enable sddm.service- You might need to use the
--forceflag if an existingdisplay-manager.servicesymlink needs to be overridden.
- You might need to use the
- Start the new DM, or reboot the system:
sudo systemctl start lightdm.service
# OR
sudo reboot
The Display Manager you choose will typically be responsible for presenting the graphical login screen and launching the selected Desktop Environment (DE), which is why the terms are sometimes confused. Common DMs include GDM (for GNOME), LightDM (for Xfce, LXDE, Unity), and SDDM (for KDE Plasma, LXQt).