Self-Hosting : Set Up a Custom DNS Server (BIND9) and Web Server (Apache2) on Your VPC VM
This detailed guide walks you through transforming a cloud Virtual Machine (VM) into a full-fledged local web-hosting and DNS environment. Using a simple custom domain name like myweb.local, we’ll set up the Apache2 web server and configure BIND9 as a DNS server on an Ubuntu VM with a private IP of 10.10.1.20.
This process covers the necessary steps within the VM and the critical network configurations (ACLs and Port Forwarding) required by your VPC infrastructure.
Prerequisites: Your Cloud Environment Details
Before starting, ensure you have the following information about your VM, as these values will be used throughout the configuration:
| Component | Value | Role |
|---|---|---|
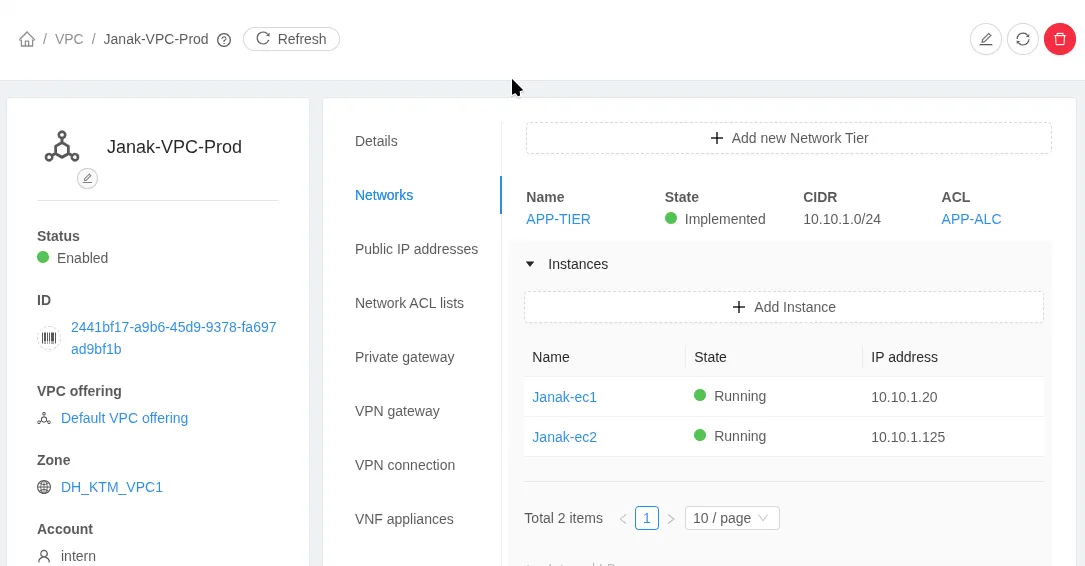
| VM Name | Janak-ec1 | The target server instance. |
| Private IP | 10.10.1.20 | The internal address of your server. |
| Public IP | 103.90.87.59 | The external address for internet access. |
| VPC Subnet | 10.10.1.0/24 | The network where your VM resides. |
| Custom Domain | myweb.local | The domain name we are configuring. |
Step 1: VM Preparation and Web Server Installation (Apache2)
Start by connecting to your VM via SSH and preparing the system.
A. System Update and Upgrade
Ensure all your software packages are current.
| Command | Explanation |
|---|---|
sudo apt update | Fetches the latest package information. |
sudo apt upgrade -y | Upgrades all installed packages. |
B. Install and Configure Apache2
Install the web server and open its default ports in the VM’s local firewall (UFW).
| Command | Explanation |
|---|---|
sudo apt install apache2 -y | Installs the Apache HTTP Server. |
sudo systemctl status apache2 | Confirms the service is active (running). |
sudo ufw allow 'Apache' | Allows incoming traffic on HTTP (Port 80) and HTTPS (Port 443) in the local firewall. |
sudo ufw enable | Enables the UFW firewall if it isn’t already active. |
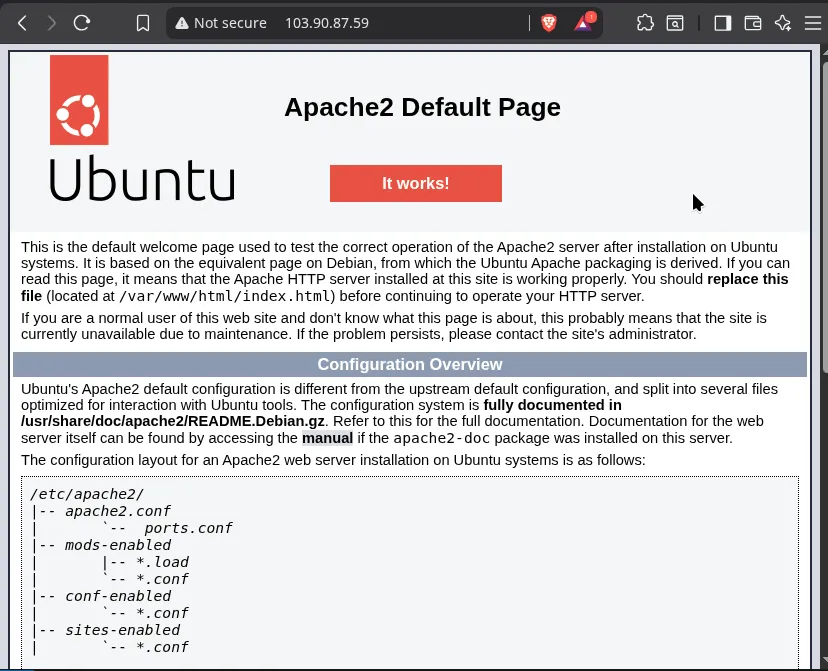
Test the Web Server: After these steps, you should be able to access the default Apache “It works!” page using your VM’s public IP address (103.90.87.59) in a web browser.
Step 2: DNS Server Installation and Configuration (BIND9)
The BIND9 package will act as our authoritative DNS server for myweb.local.
A. Install BIND9
| Command | Explanation |
|---|---|
sudo apt install bind9 bind9utils -y | Installs BIND9 and utility tools for checking configurations. |
B. Define Custom Zones in BIND
We need to tell BIND to manage the forward lookup (myweb.local -> IP) and the reverse lookup (IP -> myweb.local).
-
Open the configuration file:
sudo nano /etc/bind/named.conf.local -
Add the following zone definitions:
// Forward Zone Definition
zone "myweb.local" {
    type master;
    file "/etc/bind/db.myweb.local";
};

// Reverse Zone Definition (Reverse of 10.10.1.x is '1.10.10')
zone "1.10.10.in-addr.arpa" {
    type master;
    file "/etc/bind/db.10.10.1";
};
C. Create the Forward Zone File (db.myweb.local)
This file maps the domain name to your VM’s private IP (10.10.1.20).
-
Copy the template:
sudo cp /etc/bind/db.local /etc/bind/db.myweb.local -
Edit the file:
sudo nano /etc/bind/db.myweb.local -
Insert the following content (adjusting the serial number if you make changes):
$TTL 604800
@    IN    SOA    myweb.local.    admin.myweb.local. (
             2025101301  ; Serial
             604800      ; Refresh
             86400       ; Retry
             2419200     ; Expire
             604800 )    ; Negative Cache TTL
;
@    IN    NS    ns1.myweb.local.
ns1  IN    A     10.10.1.20   ; Nameserver A record
@    IN    A     10.10.1.20   ; Domain A record (myweb.local)
www  IN    A     10.10.1.20   ; Subdomain A record (www.myweb.local)
D. Create the Reverse Zone File (db.10.10.1)
This file maps the private IP back to the domain name.
-
Copy the template:
sudo cp /etc/bind/db.127 /etc/bind/db.10.10.1 -
Edit the file:
sudo nano /etc/bind/db.10.10.1 -
Insert the following content:
$TTL 604800
@    IN    SOA    myweb.local.    admin.myweb.local. (
             2025101301  ; Serial
             604800      ; Refresh
             86400       ; Retry
             2419200     ; Expire
             604800 )    ; Negative Cache TTL
;
@    IN    NS    ns1.myweb.local.
20   IN    PTR   ns1.myweb.local.    ; PTR for nameserver IP
20   IN    PTR   myweb.local.        ; PTR for the domain
E. Validation and Restart
Verify the syntax and restart BIND.
| Command | Explanation |
|---|---|
sudo named-checkconf | Checks primary configuration syntax (should show no output). |
sudo named-checkzone myweb.local /etc/bind/db.myweb.local | Validates the forward zone file (should report OK). |
sudo named-checkzone 1.10.10.in-addr.arpa /etc/bind/db.10.10.1 | Validates the reverse zone file (should report OK). |
sudo systemctl restart bind9 | Restarts the DNS service. |
sudo ufw allow 53/udp | Opens the DNS port (53) on the VM’s local firewall. |
Step 3: Configure VPC Network Access Control List (APP-ALC)
Your VPC’s Network ACL is a layer of network security that controls traffic to the entire subnet. You must explicitly allow the web and DNS ports here.
ACL Ingress Rules to Add to APP-ALC
| Rule Number | CIDR List | Action | Protocol | Start Port | End Port | Traffic type | Description |
|---|---|---|---|---|---|---|---|
| 2 | 0.0.0.0/0 | Allow | tcp | 80 | 80 | Ingress | For HTTP (Web Server) |
| 3 | 0.0.0.0/0 | Allow | tcp | 53 | 53 | Ingress | For DNS (TCP) |
| 4 | 0.0.0.0/0 | Allow | udp | 53 | 53 | Ingress | For DNS (UDP) |
Step 4: Configure Port Forwarding on Public IP
Port forwarding maps traffic from your public IP (103.90.87.59) to your VM’s private IP (10.10.1.20). This is crucial for external access.
Target the Janak-ec1 (10.10.1.20) instance for all these rules.
| Private Port | Public Port | Protocol | Source CIDR list | Description |
|---|---|---|---|---|
| 80 | 80 | TCP | 0.0.0.0/0 | Forward HTTP traffic |
| 53 | 53 | TCP | 0.0.0.0/0 | Forward DNS TCP traffic |
| 53 | 53 | UDP | 0.0.0.0/0 | Forward DNS UDP traffic (Most important for queries) |
Test DNS Resolution on the server VM
Use nslookup on your VM to confirm BIND is working locally:
| Command | Role | Expected Result |
|---|---|---|
sudo apt install dnsutils -y | Installs the necessary tool. | N/A |
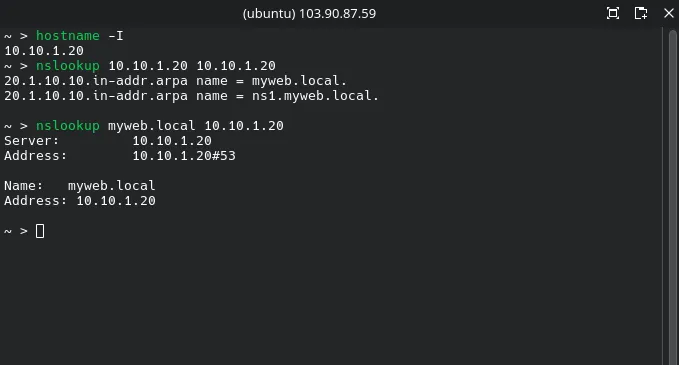
nslookup myweb.local 10.10.1.20 | Forward Lookup Test. | Resolves myweb.local to 10.10.1.20. |
nslookup 10.10.1.20 10.10.1.20 | Reverse Lookup Test. | Resolves 10.10.1.20 to myweb.local. |
Client Configuration: Pointing Your System to the New DNS Server
Before configuring the client, ensure the client machine can reach your server’s private IP (10.10.1.20).
To fully utilize your custom domain (myweb.local), any client machine must be configured to use your new DNS server (10.10.1.20 or 103.90.87.59).
Temporary DNS Configuration (Quick Testing)
There are two easy ways to test your new DNS server without making system-wide changes.
A. Direct Query using nslookup
This is the fastest method to verify that your DNS server is responding correctly to your custom domain.
| Scenario | Command | IP to Use | Explanation |
|---|---|---|---|
| Client Inside VPC | nslookup myweb.local 10.10.1.20 | Private IP (10.10.1.20) | Explicitly queries your DNS server directly. |
| Client Outside VPC | nslookup myweb.local 103.90.87.59 | Public IP (103.90.87.59) | Queries the public address, relying on your VPC’s Port Forwarding to reach the DNS server. |
- Expected Resolution: The query should resolve
myweb.localto the VM’s private IP:10.10.1.20.
B. Manual Override using /etc/resolv.conf (Linux/macOS)
Manually editing /etc/resolv.conf temporarily overrides your system’s DNS settings until a network service restarts or the system reboots. This is generally discouraged for permanent use on modern Ubuntu systems.
- Backup the current file:
sudo cp /etc/resolv.conf /etc/resolv.conf.bak - Edit the file using
nano:sudo nano /etc/resolv.conf - Replace or add the primary
nameserverline with your custom DNS server IP:# Custom DNS Server Configuration nameserver 10.10.1.20 # Your new DNS server IP nameserver 8.8.8.8 # A backup public DNS server (Optional) - Save and close (Ctrl+O, Enter, Ctrl+X).
Verification: Test the system’s new default resolution:
nslookup myweb.local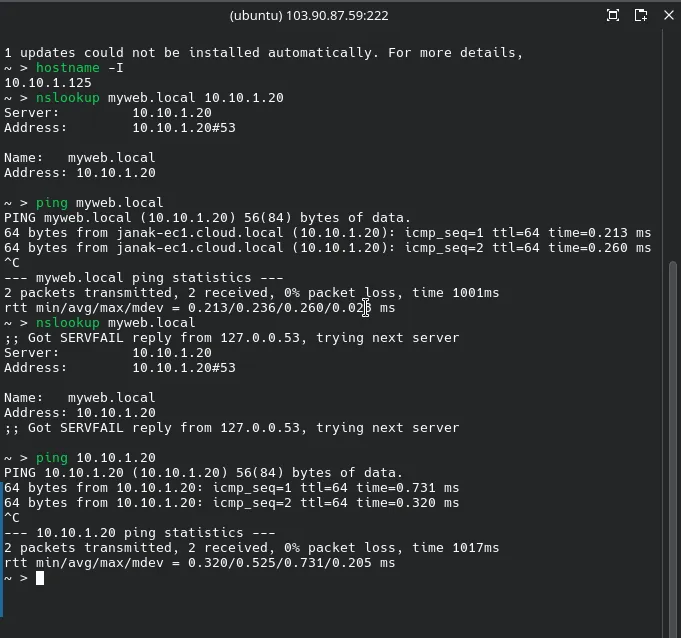
Permanent DNS Configuration (Ubuntu using Netplan)
For permanent DNS changes on Ubuntu 17.10 and later, you must configure Netplan, as it manages the system’s network settings. This method is suitable for a client VM inside your VPC.
-
Locate your Netplan configuration file:
ls /etc/netplan/(The file often has a name like
01-netcfg.yamlor50-cloud-init.yaml.) -
Edit the file (substitute your filename):
sudo nano /etc/netplan/50-cloud-init.yaml -
Modify the configuration under your network interface (e.g.,
eth0) by setting thenameserverssection. Crucially, maintain the correct YAML indentation.network: version: 2 renderer: networkd ethernets: eth0: dhcp4: no # ... other network settings (addresses, routes) nameservers: # Set your custom DNS server first, followed by a public fallback addresses: [10.10.1.20, 8.8.8.8] -
Apply the changes to make them active and persistent:
sudo netplan apply
Verification:
- Check the system resolver status:
systemd-resolve --status(Ensure your new IP is listed). - Test resolution:
nslookup myweb.local
Final Verification and Web Access
After configuring the client (either temporarily or permanently), verify end-to-end functionality.
A. Test DNS Resolution
Use your client’s command-line interface to ensure the new DNS server is being used. Remember to flush the local DNS cache before testing if you had prior unsuccessful attempts.
| Platform | DNS Cache Flush Command | Verification Command |
|---|---|---|
| Windows | ipconfig /flushdns | nslookup myweb.local |
| Linux/macOS | sudo systemd-resolve --flush-caches or sudo killall -HUP mDNSResponder | nslookup myweb.local or dig myweb.local |
B. Test Web Access
Finally, open your web browser and navigate directly to your custom domain name:
http://myweb.local
- Expected Success: The browser should load the Apache2 “It works!” page, confirming that the client successfully used your custom DNS server to find the web server and establish a connection.
How To Configure BIND as a Private Network DNS Server on Ubuntu 14.04