step-by-step to create a Virtual Machine (EC2 instance) on AWS Free Tier using Terraform and SSH to it.
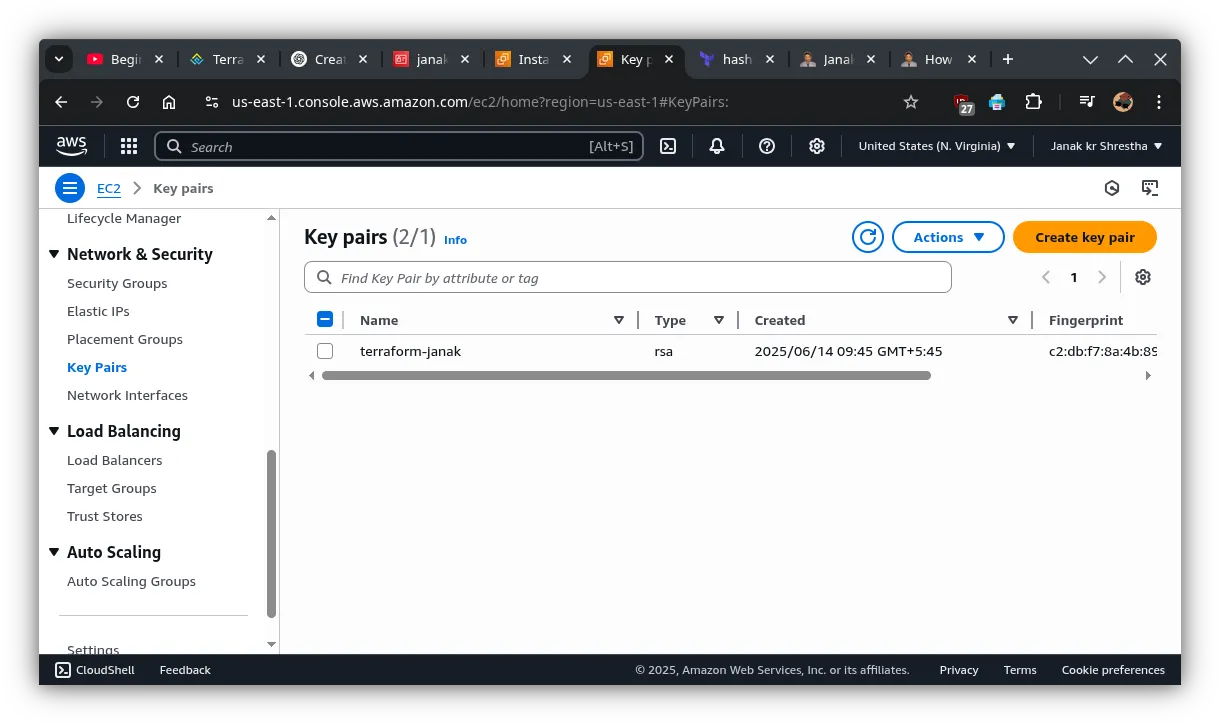
Create a key pair in AWS Console (if you don’t have one)
- Go to: AWS Console → EC2 → Key Pairs
- Click Create key pair
- Name:
my-key - Type: RSA
- Save the
.pemfile (e.g.,my-key.pem) securely
Download and move it to your project Directory and Check Permissions of the .pem File
chmod 400 my-key.pem✅ Install Required Packages
1. Install AWS CLI
sudo apt update
sudo apt install awscli -y
Verify:
aws --version2. Install Terraform
sudo apt-get update && sudo apt-get install -y gnupg software-properties-common curl
curl -fsSL https://apt.releases.hashicorp.com/gpg | sudo gpg --dearmor -o /usr/share/keyrings/hashicorp-archive-keyring.gpg
echo "deb [signed-by=/usr/share/keyrings/hashicorp-archive-keyring.gpg] https://apt.releases.hashicorp.com $(lsb_release -cs) main" | sudo tee /etc/apt/sources.list.d/hashicorp.list
sudo apt update
sudo apt install terraform -y
Verify:
terraform -version✅ Configure AWS CLI
💡 Get access keys from: AWS Console > IAM > Users > Your Username > Security Credentials > Access Keys
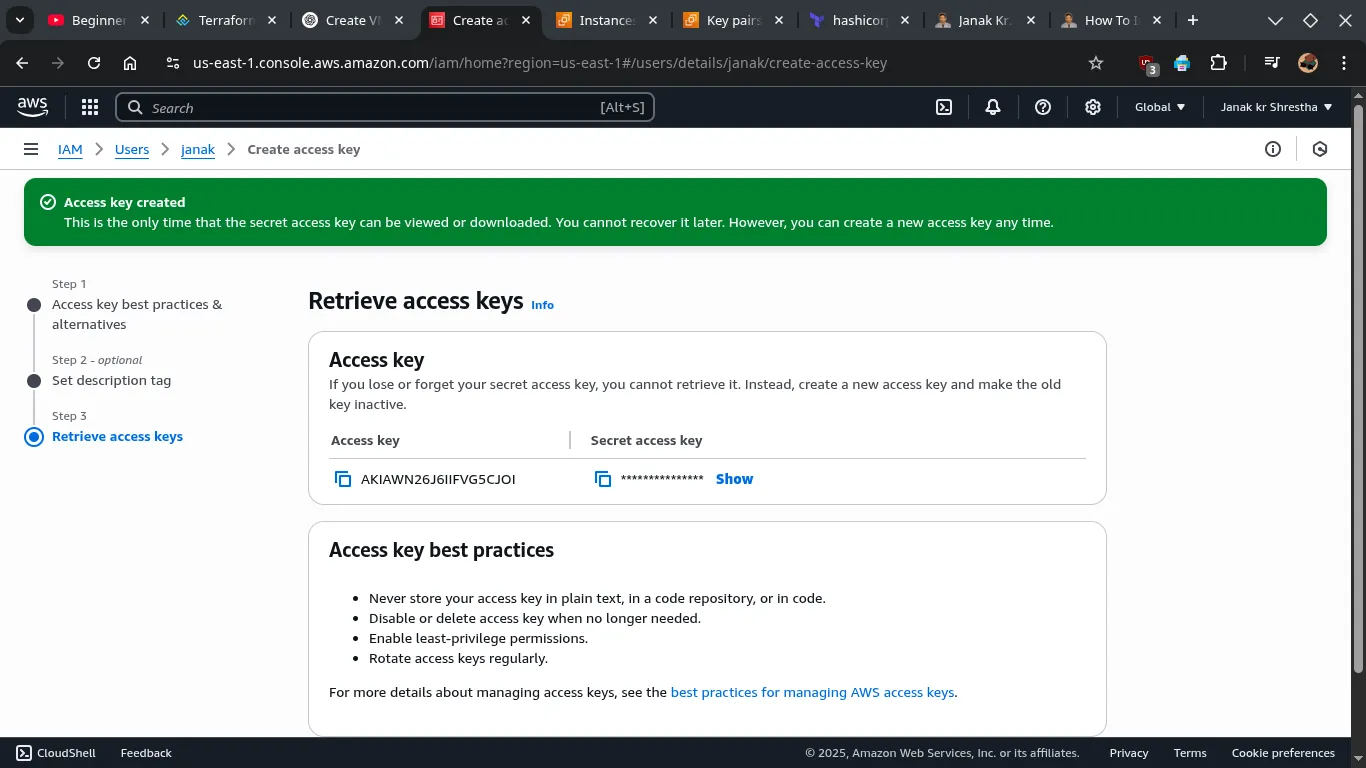
aws configureEnter the following:
- AWS Access Key ID
- AWS Secret Access Key
- Region (e.g.,
us-east-1) - Output format: Just press Enter
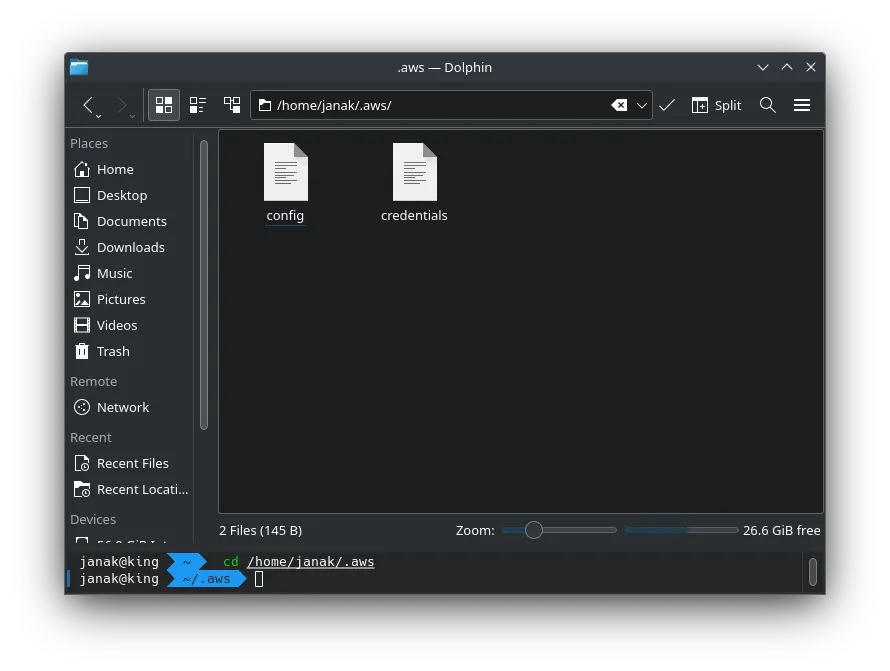
After this steps, two files are auto created inside /home/username/.aws
✅ Create Terraform Configuration
1. Create a folder
mkdir terraform-aws
cd terraform-aws
2. Create main.tf
nano main.tfPaste the following:
# --------------------------------------------------
# Terraform block to specify required providers
# --------------------------------------------------
terraform {
required_providers {
aws = {
source = "hashicorp/aws"
version = "~> 5.0" # Using a stable version of AWS provider
}
}
}
# --------------------------------------------------
# AWS provider configuration
# --------------------------------------------------
provider "aws" {
region = "us-east-1" # AWS region to deploy resources
}
# --------------------------------------------------
# Data block to fetch default VPC (used by security group)
# --------------------------------------------------
data "aws_vpc" "default" {
default = true
}
# --------------------------------------------------
# Security group resource
# --------------------------------------------------
resource "aws_security_group" "web_access_sg" {
name = "web_access_sg"
description = "Allow SSH, HTTP, and HTTPS inbound traffic"
vpc_id = data.aws_vpc.default.id
# Inbound rules
ingress {
description = "SSH from anywhere"
from_port = 22
to_port = 22
protocol = "tcp"
cidr_blocks = ["0.0.0.0/0"]
}
ingress {
description = "HTTP from anywhere"
from_port = 80
to_port = 80
protocol = "tcp"
cidr_blocks = ["0.0.0.0/0"]
}
ingress {
description = "HTTPS from anywhere"
from_port = 443
to_port = 443
protocol = "tcp"
cidr_blocks = ["0.0.0.0/0"]
}
# Outbound rules
egress {
from_port = 0
to_port = 0
protocol = "-1"
cidr_blocks = ["0.0.0.0/0"]
}
}
# --------------------------------------------------
# EC2 instance resource
# --------------------------------------------------
resource "aws_instance" "my_ec2" {
ami = "ami-020cba7c55df1f615" # Ubuntu Server 20.04 LTS AMI in us-east-1
count = 1 # Number of instances to create
availability_zone = "us-east-1a" # Specify the availability zone
instance_type = "t2.micro" # Free tier eligible instance type
key_name = "aws-janak" # Replace with the name of your existing AWS EC2 key pair
security_groups = [aws_security_group.web_access_sg.name] # Attach the SSH security group
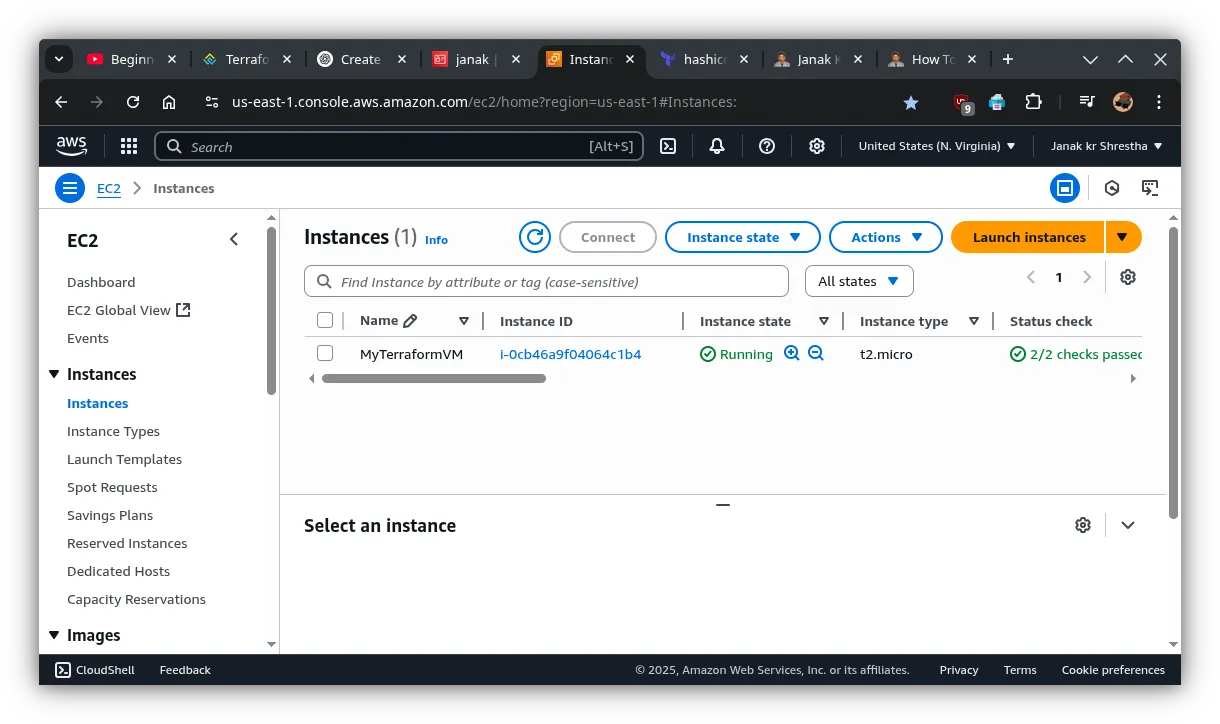
tags = {
Name = "MyTerraformVM" # Tag to identify your instance
}
}
# --------------------------------------------------
# Output block to show the public IP of the EC2 instance
# --------------------------------------------------
output "instance_public_ip" {
description = "Public IP of the EC2 instance"
value = aws_instance.my_ec2[0].public_ip
}
✅ Save & close (Ctrl + O, Enter, Ctrl + X)
✅ Initialize Terraform
terraform init✅ Code Formatting Terraform (optional)
terraform fmt✅ Validate Configuration
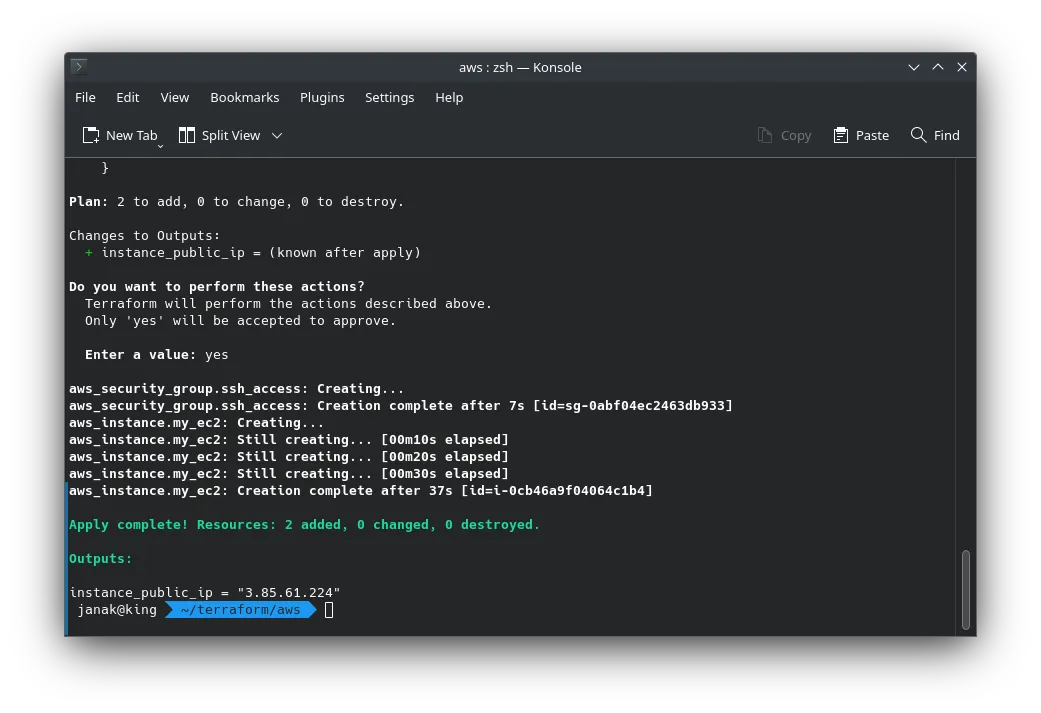
terraform validate✅ Apply the Configuration
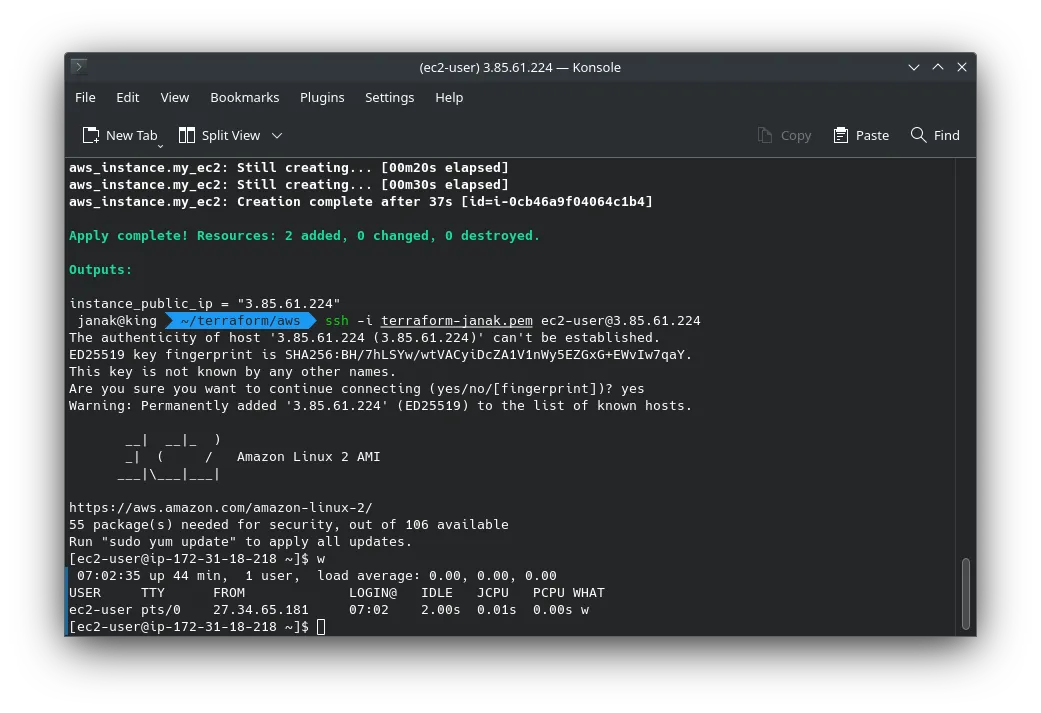
terraform applyIt will show you a plan. Type yes to proceed.
✅ Access Your EC2 Instance via SSH from your linxu machine.
ssh -i my-key.pem ec2-user@<public_ip>📝 Use ec2-user for Amazon Linux AMI (or ubuntu if you switch to Ubuntu AMI).
✅ Destroy the Instance
terraform destroyTerraform Handy Commands
These commands are crucial for almost every Terraform workflow.
I. Initialization and Configuration
-
terraform init- Purpose: Initializes a Terraform working directory. This command downloads necessary providers and modules specified in your configuration.
- When to use: Always the first command you run in a new or cloned Terraform directory, or when you add/change provider/module configurations.
- Example:
terraform init
-
terraform validate- Purpose: Checks the syntax and configuration of your Terraform files (
.tf) for correctness and internal consistency. It does not check against the actual cloud provider. - When to use: Before
terraform planorterraform applyto catch errors early. - Example:
terraform validate
- Purpose: Checks the syntax and configuration of your Terraform files (
II. Planning and Applying Changes
-
terraform plan- Purpose: Generates an execution plan. It shows you exactly what actions Terraform will take (create, modify, destroy) to reach the desired state defined in your configuration, without actually performing them.
- When to use: Before
terraform applyto review the proposed changes and ensure they are what you expect. - Example:
terraform plan - Save Plan for Apply:
terraform plan -out=myplan.tfplan(saves the plan to a file)
-
terraform apply- Purpose: Executes the actions proposed in a Terraform plan to create, update, or destroy infrastructure. This is the command that makes changes to your cloud environment.
- When to use: After
terraform planand you are satisfied with the proposed changes. - Example:
terraform apply - Apply a Saved Plan:
terraform apply myplan.tfplan(applies a plan saved with-out) - Auto-approve (for CI/CD or experienced users):
terraform apply -auto-approve(bypasses the confirmation prompt)
III. State Management and Inspection
-
terraform show- Purpose: Reads the current state file and outputs the managed infrastructure’s configuration in a human-readable format.
- When to use: To inspect the current state of your deployed resources.
- Example:
terraform show - Show a saved plan:
terraform show myplan.tfplan
-
terraform state list- Purpose: Lists all resources managed by the current Terraform state.
- When to use: To get an overview of what Terraform is currently managing.
- Example:
terraform state list
-
terraform state show [resource_address]- Purpose: Displays the attributes of a specific resource within the Terraform state.
- When to use: To get detailed information about a single resource.
- Example:
terraform state show aws_instance.my_server(replaceaws_instance.my_serverwith your resource name)
-
terraform output [output_name]- Purpose: Displays the value(s) of output variables defined in your Terraform configuration.
- When to use: To easily retrieve specific information (like an IP address, DNS name, ARN) from your deployed infrastructure.
- Example:
terraform output instance_public_ip(to get a specific output) - All outputs:
terraform output(to list all outputs)
IV. Destruction
terraform destroy- Purpose: Destroys all resources managed by the current Terraform configuration. Use with extreme caution!
- When to use: When you no longer need the infrastructure and want to tear it down completely.
- Example:
terraform destroy - Auto-approve:
terraform destroy -auto-approve(bypasses the confirmation prompt)
V. Workspace Management (Advanced)
-
terraform workspace list- Purpose: Lists available workspaces. Workspaces allow you to manage multiple distinct environments (e.g., dev, staging, prod) using the same Terraform configuration.
- Example:
terraform workspace list
-
terraform workspace new [workspace_name]- Purpose: Creates a new workspace.
- Example:
terraform workspace new production
-
terraform workspace select [workspace_name]- Purpose: Switches to an existing workspace.
- Example:
terraform workspace select staging
General Workflow Tip:
terraform initterraform validateterraform planterraform applyterraform output(to get useful info)terraform destroy(when done)
These commands form the backbone of most Terraform operations and will cover the vast majority of your use cases! You’re looking for a good set of “handy” Terraform commands! Here’s a breakdown of the most commonly used and useful commands, categorized for easier understanding:
1. Core Workflow Commands (The Essentials):
-
terraform init:- Purpose: Initializes a working directory containing Terraform configuration files. This is the first command you run in a new or cloned Terraform project.
- What it does: Downloads necessary providers, modules, and sets up the backend (where your state file will be stored).
- Handy Options:
terraform init -upgrade: Upgrades provider plugins to the newest available versions.terraform init -migrate-state: Used when changing backend configurations to attempt to migrate the state.
-
terraform validate:- Purpose: Checks whether the configuration files in a directory are syntactically valid and internally consistent.
- What it does: Catches syntax errors, mismatched types, and other configuration issues before attempting a plan or apply. It doesn’t check against actual cloud resources.
-
terraform plan:- Purpose: Generates an execution plan, showing you what actions Terraform will take to achieve the desired state of your infrastructure. This is a dry run.
- What it does: Compares your configuration with the current state of your real infrastructure (if any) and your Terraform state file, then outlines the additions, modifications, or deletions it would perform.
- Handy Options:
terraform plan -out=myplan.tfplan: Saves the plan to a file, which can then be applied later withterraform apply myplan.tfplan. This is great for review or CI/CD pipelines.terraform plan -destroy: Generates a plan to destroy all resources managed by the configuration. Useful for previewing a complete teardown.terraform plan -target=resource_type.resource_name: Plans changes only for a specific resource (use with caution, as it can lead to state drift).
-
terraform apply:- Purpose: Applies the changes required to reach the desired state of the configuration. This command modifies your real infrastructure.
- What it does: Executes the plan (either one generated by
terraform planor a new one it creates internally) and provisions/modifies/deletes resources in your cloud provider. - Handy Options:
terraform apply --auto-approve: Skips the interactive “yes/no” prompt, useful for automation (e.g., CI/CD). Use with extreme care!terraform apply myplan.tfplan: Applies a previously saved plan.terraform apply -target=resource_type.resource_name: Applies changes only for a specific resource (again, use with caution).
-
terraform destroy:- Purpose: Destroys previously created infrastructure managed by the current Terraform configuration.
- What it does: Reverses the
terraform applyprocess, removing all resources defined in your configuration from your cloud provider. - Handy Options:
terraform destroy --auto-approve: Skips the interactive “yes/no” prompt, useful for automation. Use with extreme caution!terraform destroy -target=resource_type.resource_name: Destroys only a specific resource.
2. State Management Commands (Critical for Operations):
-
terraform show:- Purpose: Provides human-readable output from a state or plan file.
- What it does: Displays the current state of your managed infrastructure, including resource attributes like IP addresses, IDs, etc. If you pass it a
.tfplanfile, it shows the details of that plan. - Handy Options:
terraform show -json: Outputs the state or plan in JSON format, useful for programmatic parsing.
-
terraform output [output_name]:- Purpose: Displays the output values defined in your Terraform configuration.
- What it does: If
output_nameis provided, it prints the value of that specific output. If no name is given, it prints all defined outputs. This is how you retrieve important dynamic values like VM IPs, load balancer DNS names, etc.
-
terraform state list:- Purpose: Lists all resources currently tracked in your Terraform state file.
- What it does: Gives you an overview of what Terraform thinks it’s managing.
-
terraform state show resource_address:- Purpose: Displays detailed attributes of a specific resource in the state file.
- What it does: Similar to
terraform show, but specifically targets a single resource.
-
terraform state mv old_address new_address:- Purpose: Moves a resource’s address in the state file.
- What it does: Useful when you refactor your Terraform code and rename resources, allowing you to tell Terraform that
aws_instance.old_nameis nowaws_instance.new_namewithout destroying and recreating it.
-
terraform state rm resource_address:- Purpose: Removes a resource from the state file.
- What it does: This does not destroy the actual resource in the cloud, only removes Terraform’s knowledge of it. Use carefully! This can be handy if you want to manually manage a resource or re-import it later.
-
terraform refresh:- Purpose: Reads the current settings from all managed remote objects and updates the Terraform state to match.
- What it does: Useful if you suspect your state file might be out of sync with your real infrastructure due to manual changes or external factors.
terraform planandterraform applyinclude a refresh step by default.
-
terraform import resource_type.resource_name resource_id:- Purpose: Imports existing infrastructure into your Terraform state.
- What it does: Allows you to bring resources that were not created by Terraform under Terraform’s management. You’ll need to define the resource in your
.tffiles first, then runimport.
3. Utility and Helper Commands:
-
terraform fmt:- Purpose: Rewrites Terraform configuration files to a canonical format and style.
- What it does: Ensures consistent formatting across your team’s code, making it more readable. Always a good practice to run this before committing changes.
- Handy Options:
terraform fmt --check: Checks if files are formatted correctly without actually modifying them (useful in CI/CD).terraform fmt --diff: Shows the differences that would be applied by formatting.
-
terraform workspace:- Purpose: Manages workspaces, which allow you to have multiple distinct state files for a single Terraform configuration (e.g.,
dev,staging,prodenvironments). - Handy Subcommands:
terraform workspace list: Lists all existing workspaces.terraform workspace show: Shows the name of the current workspace.terraform workspace new [name]: Creates a new workspace.terraform workspace select [name]: Switches to an existing workspace.terraform workspace delete [name]: Deletes a workspace (must be empty).
- Purpose: Manages workspaces, which allow you to have multiple distinct state files for a single Terraform configuration (e.g.,
-
terraform console:- Purpose: Provides an interactive console for evaluating and experimenting with Terraform expressions and functions.
- What it does: Great for testing interpolation syntax, variable values, and built-in functions without running a full plan or apply.
-
terraform graph:- Purpose: Generates a visual representation of either a configuration or execution plan.
- What it does: Outputs in DOT format, which can be visualized using tools like Graphviz to see dependencies between resources.
-
terraform taint resource_address:- Purpose: Marks a resource instance as “tainted” in the state file.
- What it does: When you next run
terraform apply, a tainted resource will be destroyed and recreated. Useful if a resource is in a bad state and you want Terraform to replace it.
-
terraform untaint resource_address:- Purpose: Removes the “tainted” status from a resource instance.
-
terraform force-unlock LOCK_ID:- Purpose: Manually unlocks the state if it’s locked due to a failed operation.
- What it does: Use with extreme caution and only if you are certain no other Terraform process is running, as it can lead to state corruption.
-
terraform version:- Purpose: Shows the current Terraform version and checks for updates.
General Tips for Using Commands:
terraform --helporterraform [command] --help: Almost every Terraform command and subcommand has built-in help. Use it liberally!- Always
planbeforeapply: This is a golden rule to avoid unexpected infrastructure changes. - Version Control: Keep your Terraform configuration files in a version control system (like Git).
- Remote State: For collaborative environments and production, configure a remote backend (like S3, Azure Blob Storage, HashiCorp Cloud) to store your state file. This ensures consistency and enables state locking.
This list covers the most frequently used and crucial Terraform commands to manage your infrastructure effectively.
📖 References & Further Reading
-
Terraform Plans, Modules, and Remote State – by Wahl Network A great explanation of how Terraform handles infrastructure planning, modularization, and remote state management. 🔗 https://wahlnetwork.com/2020/04/29/terraform-plans-modules-and-remote-state/
-
Terraform AWS Provider Documentation – Official Registry The complete reference for all AWS resources supported in Terraform, including syntax, arguments, and examples. 🔗 https://registry.terraform.io/providers/hashicorp/aws/latest