step-by-step guide to generate the required values for using Terraform with Microsoft Azure:
✅ Install Required Tools
You’ll need to install the following tools on your local machine:
1. Terraform
-
Download and install Terraform for your operating system.
-
After installation, verify with:
terraform -v
2. Azure CLI
-
Go to: https://learn.microsoft.com/en-us/cli/azure/install-azure-cli
-
Install the Azure CLI for your OS.
-
After installation, check it:
az version
✅ Log in to Azure
Login to your Azure account using Azure CLI:
az loginA browser window will open asking you to log in with your student pack credentials.
You can list your subscription:
az account show⚙️ Get the azure_subscription_id and azure_tenant_id
Run this command:
az account show --query "{subscriptionId:id, tenantId:tenantId}"Output:
{
  "subscriptionId": "xxxxxxxx-xxxx-xxxx-xxxx-xxxxxxxxxxxx",
  "tenantId": "yyyyyyyy-yyyy-yyyy-yyyy-yyyyyyyyyyyy"
}
✅ Copy the values for:
azure_subscription_idazure_tenant_id
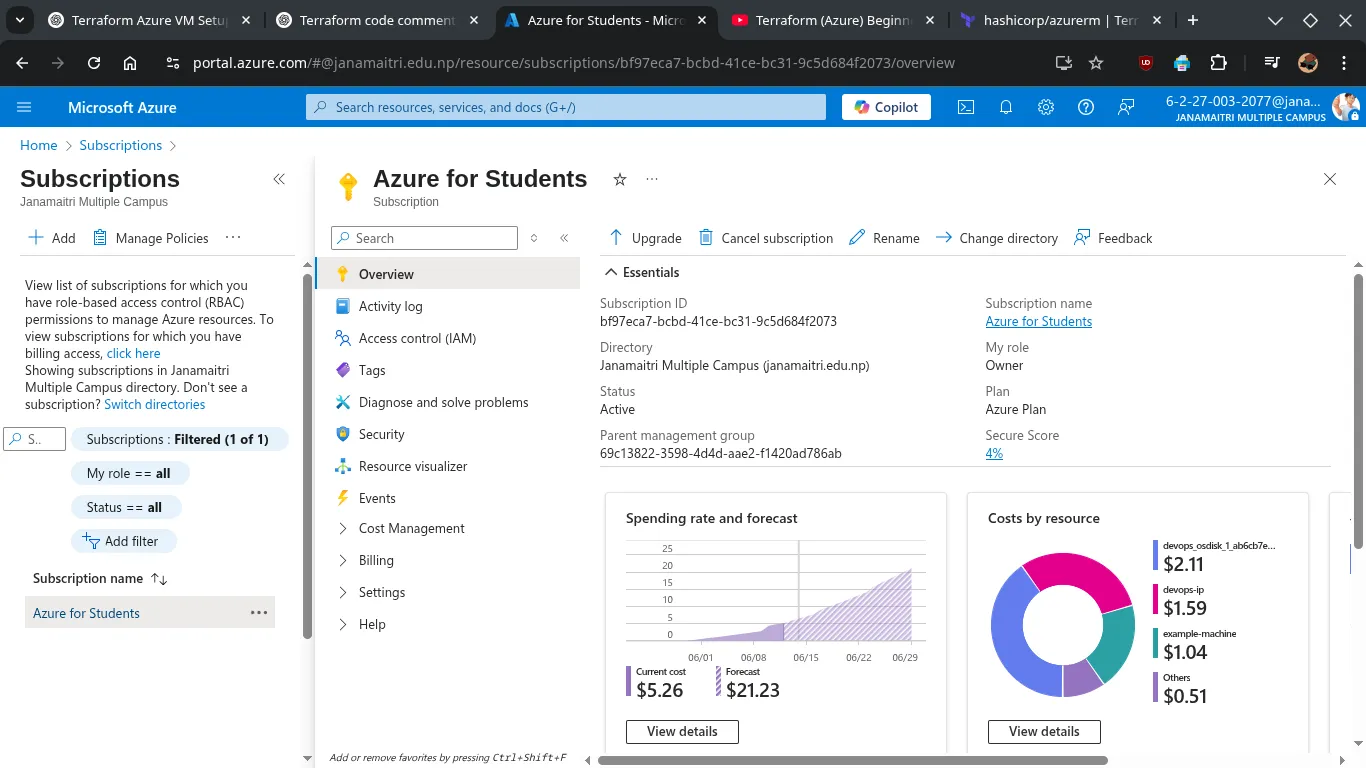
Get Azure Subscription ID via GUI
-
Go to Azure Portal 👉 Visit: https://portal.azure.com Log in with your Azure account.
-
Open ‘Subscriptions’ Panel
- Click on the search bar at the top.
- Type “Subscriptions” and click on the result.
-
View Subscription Details
- You’ll see a list of your subscriptions.
- Each subscription will show the Subscription name and the Subscription ID.
-
Copy the Subscription ID
- Click on the subscription name to open its details.
- The Subscription ID will be visible in the overview pane.
- Click the copy icon 📋 next to it to copy.
🛠️ Create a Service Principal (SP) / App registrations
This SP will be used by Terraform to authenticate.
az ad sp create-for-rbac --name terraform-janak --role="Contributor" --scopes="/subscriptions/<subscription-id>"Replace <subscription-id> with the actual value
Output:
{
  "appId": "zzzzzzzz-zzzz-zzzz-zzzz-zzzzzzzzzzzz",
  "displayName": "terraform-sp",
  "password": "********-****-****-****-************",
  "tenant": "yyyyyyyy-yyyy-yyyy-yyyy-yyyyyyyyyyyy"
}
✅ Save:
azure_client_id = appIdazure_client_secret = passwordazure_tenant_id = tenant(same as before)
GUI Methods: Step-by-step guide to get your Azure Client ID, Client Secret, and Tenant ID from the Azure Portal (GUI) using App Registrations:
Step 1: Go to App Registrations
- Click on the Search bar at the top.
- Type “App registrations” and select it.
- Click “+ New registration”.
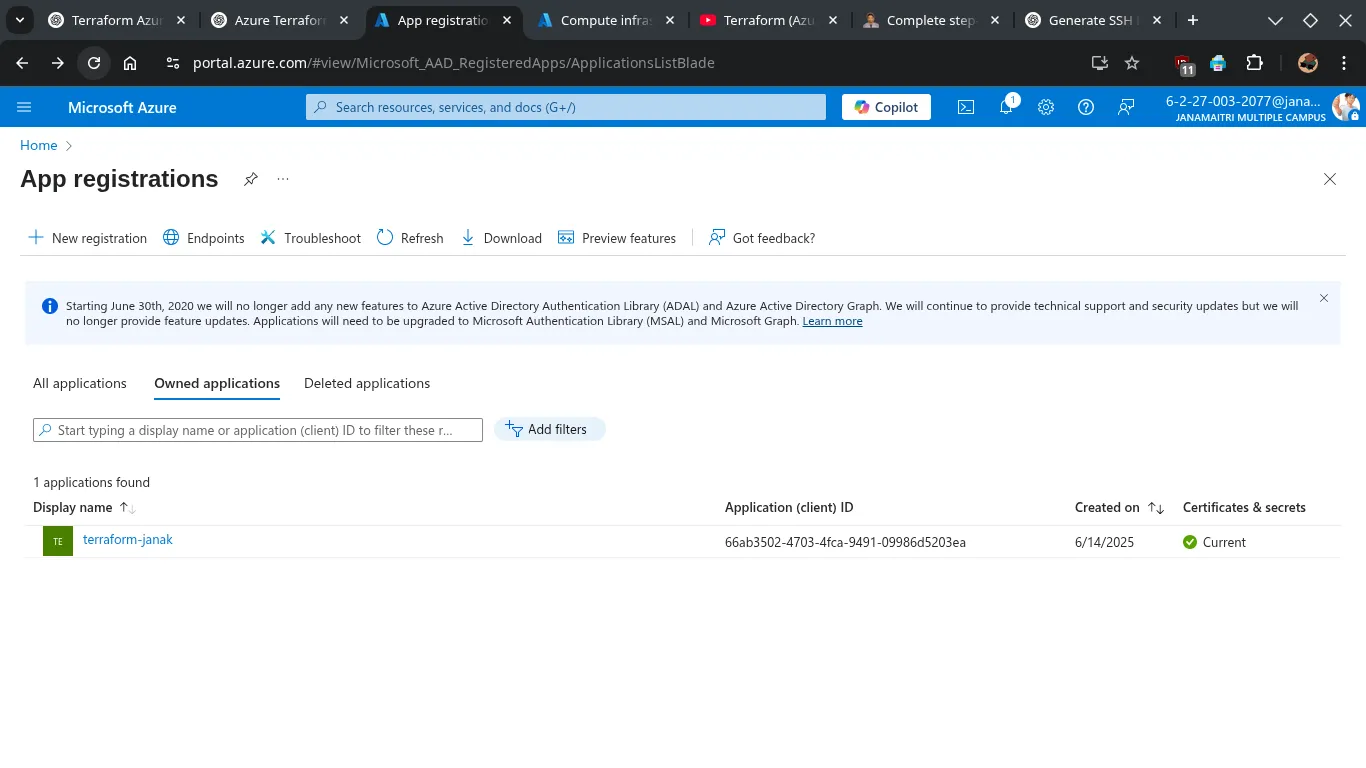
Step 2: Register the Application
- Name your app (e.g.,
terraform-janak). - Leave the default Supported account types as Single tenant (or your choice).
- Redirect URI: leave empty
- Click “Register”.
🔹 Step 3: Get the IDs
✅ Client ID (azure_client_id)
- Go to the Overview tab.
- Copy the value labeled “Application (client) ID”.
✅ Tenant ID (azure_tenant_id)
- In the same Overview tab.
- Copy the value labeled “Directory (tenant) ID”.
🔹 Step 4: Create a Client Secret
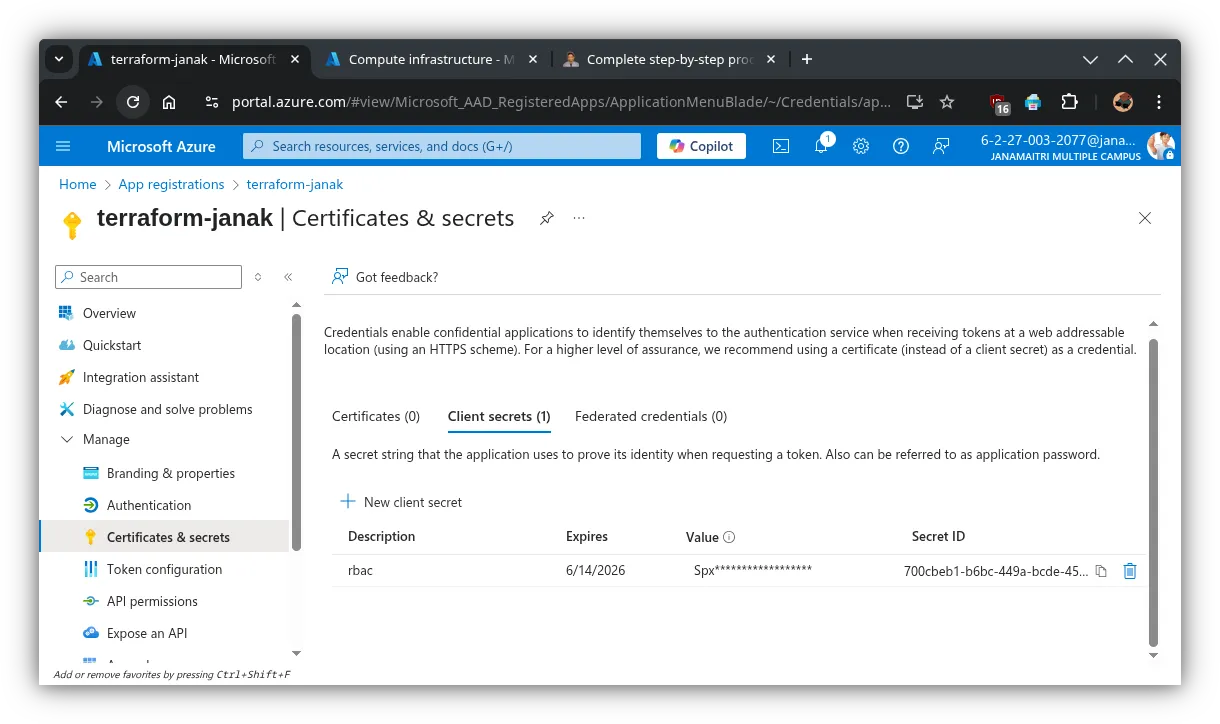
- In the left menu, click “Certificates & secrets”.
- Under Client secrets, click “+ New client secret”.
- Add a description (e.g.,
anything), choose an expiration (e.g., 6 or 12 months). - Click “Add”.
- Copy the value immediately shown under “Value” – this is your
azure_client_secret. ⚠️ You won’t be able to view it again once you leave the page.
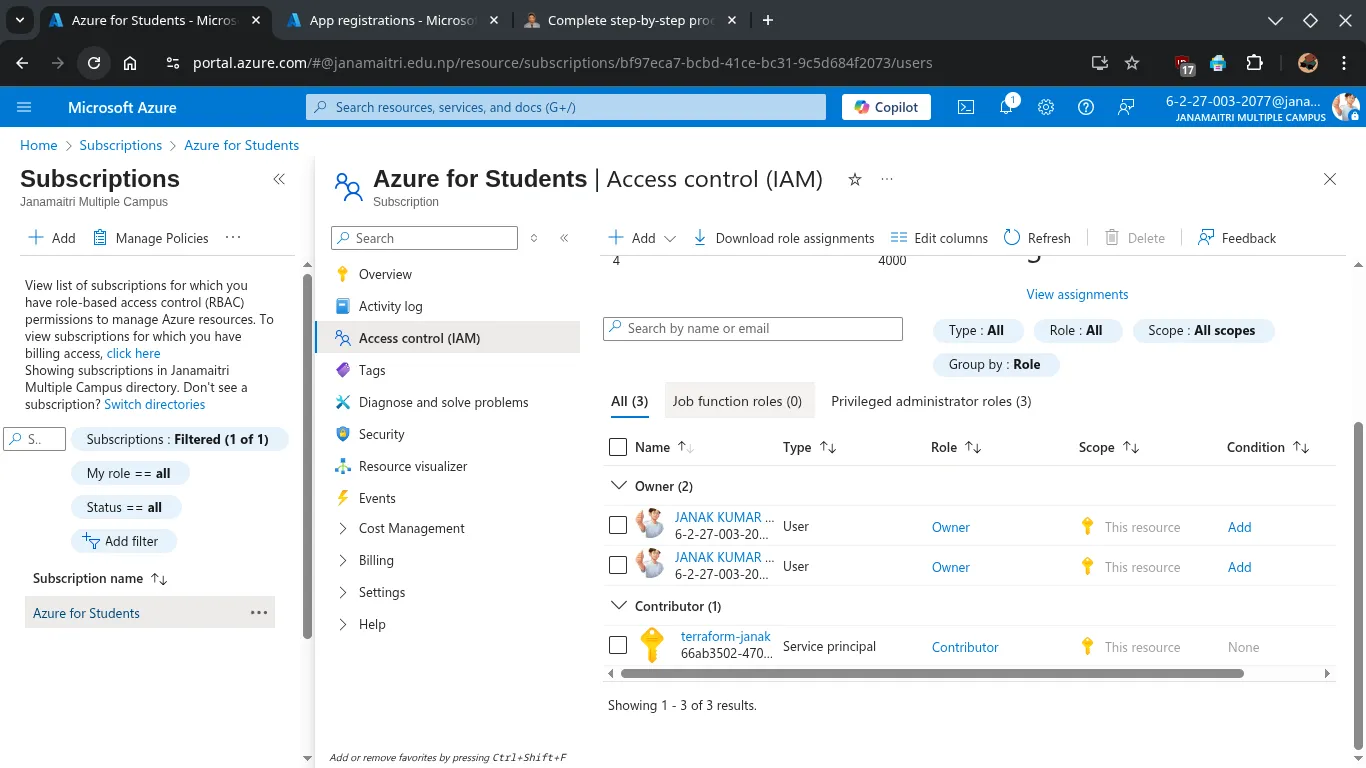
👮 Confirm Role Assignment
You can check if the role was properly assigned:
az role assignment list --assignee <appId>Assign Contributor role:
az role assignment create \
  --assignee <app-id> \
  --role "Contributor" \
  --scope /subscriptions/<subscription-id>
GUI Methods: Assign Permissions to the App
To give your app permissions to deploy resources:
- Go to Subscriptions → Select your subscription.
- Click “Access control (IAM)”.
- Click “+ Add” > “Add role assignment”.
- Under the Privileged administrator roles choose: Contributor
- Assign access to: User, group, or service principal
- Select Members: search for your app name (
Terraform-janak) and select it.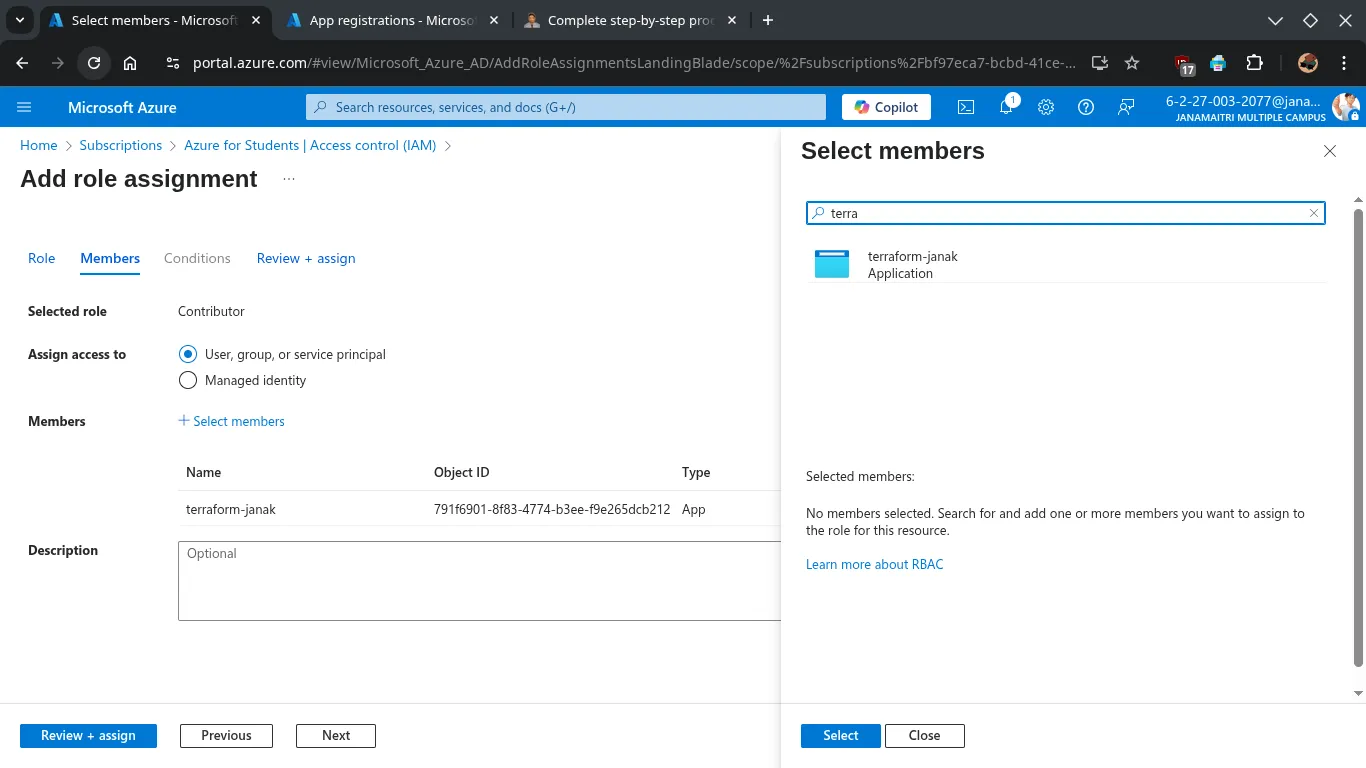
- Click Save.
📌 Summary of Values
You now have:
| Variable | Description |
|---|---|
azure_subscription_id | Your Azure subscription ID |
azure_client_id | appId |
azure_client_secret | password |
azure_tenant_id | Azure tenant ID |
✅ Generate SSH Key (If not)
ssh-keygen -t rsa -b 4096 -C "[email protected]"✅ Configure Terraform Directory
-
Create a new project folder:
mkdir terraform-azure cd terraform-azure -
Create a file named
main.tf:nano main.tf
Paste the following into main.tf (you can edit names later):
# ------------------------------
# Specify the required provider
# ------------------------------
terraform {
  required_providers {
    azurerm = {
      source  = "hashicorp/azurerm"
      version = "~> 4.0" # Ensures you're using version 4.x of the Azure provider
    }
  }
}

# -----------------------------------------
# Configure the Azure provider credentials
# -----------------------------------------
provider "azurerm" {
  features {}

  # These variables will be passed via CLI, environment, or tfvars
  subscription_id = var.azure_subscription_id
  client_id       = var.azure_client_id
  client_secret   = var.azure_client_secret
  tenant_id       = var.azure_tenant_id
}

# -------------------------------
# Create a new Azure Resource Group
# -------------------------------
resource "azurerm_resource_group" "janak-azure" {
  name     = "Janak-res"  # Resource group name
  location = "westeurope"             # Azure region
}

# ---------------------------
# Create a Virtual Network
# ---------------------------
resource "azurerm_virtual_network" "janak-azure" {
  name                = "janak-azure-network"            # Name of the VNet
  address_space       = ["10.0.0.0/16"]              # CIDR block
  location            = azurerm_resource_group.janak-azure.location
  resource_group_name = azurerm_resource_group.janak-azure.name
}

# ----------------------
# Create a Subnet inside the VNet
# ----------------------
resource "azurerm_subnet" "janak-azure" {
  name                 = "internal"                                # Subnet name
  resource_group_name  = azurerm_resource_group.janak-azure.name
  virtual_network_name = azurerm_virtual_network.janak-azure.name
  address_prefixes     = ["10.0.2.0/24"]                          # Subnet IP range
}

# ----------------------------
# Create a Static Public IP Address
# ----------------------------
resource "azurerm_public_ip" "janak-azure" {
  name                = "janak-azure-public-ip"
  location            = azurerm_resource_group.janak-azure.location
  resource_group_name = azurerm_resource_group.janak-azure.name
  allocation_method   = "Static"       # IP will not change
  sku                 = "Standard"     # Standard SKU supports NSG and zones
  sku_tier            = "Regional"     # Tier of the SKU
}

# -------------------------------
# Create a Network Security Group (NSG)
# -------------------------------
resource "azurerm_network_security_group" "janak-azure" {
  name                = "janak-azure-nsg"
  location            = azurerm_resource_group.janak-azure.location
  resource_group_name = azurerm_resource_group.janak-azure.name

  # Allow inbound SSH (port 22) from anywhere
  security_rule {
    name                       = "Allow-SSH"
    priority                   = 1001
    direction                  = "Inbound"
    access                     = "Allow"
    protocol                   = "Tcp"
    source_port_range          = "*"
    destination_port_range     = "22"
    source_address_prefix      = "*"
    destination_address_prefix = "*"
  }
}

# -----------------------------------------------------
# Associate NSG with the network interface of the VM
# -----------------------------------------------------
resource "azurerm_network_interface_security_group_association" "janak-azure" {
  network_interface_id      = azurerm_network_interface.janak-azure.id
  network_security_group_id = azurerm_network_security_group.janak-azure.id
}

# ----------------------------
# Create a Network Interface
# ----------------------------
resource "azurerm_network_interface" "janak-azure" {
  name                = "janak-azure-nic"
  location            = azurerm_resource_group.janak-azure.location
  resource_group_name = azurerm_resource_group.janak-azure.name

  # IP configuration for the NIC
  ip_configuration {
    name                          = "internal"
    subnet_id                     = azurerm_subnet.janak-azure.id
    private_ip_address_allocation = "Dynamic"
    public_ip_address_id          = azurerm_public_ip.janak-azure.id
  }
}

# ----------------------------
# Create a Linux Virtual Machine
# ----------------------------
resource "azurerm_linux_virtual_machine" "janak-azure" {
  name                  = "Janak-azure-terraform"                        # Name of the VM
  resource_group_name   = azurerm_resource_group.janak-azure.name
  location              = azurerm_resource_group.janak-azure.location
  size                  = "Standard_B1s"                        # Free-tier eligible size
  admin_username        = "janak_azure"                          # SSH login username
  network_interface_ids = [azurerm_network_interface.janak-azure.id]

  # SSH Key-based authentication
  admin_ssh_key {
    username   = "janak_azure"
    public_key = file("~/.ssh/id_rsa.pub")                    # Path to public SSH key
  }

  disable_password_authentication = true                      # Force key-only login

  # OS Disk configuration
  os_disk {
    caching              = "ReadWrite"
    storage_account_type = "Standard_LRS"
  }

  # Use latest Ubuntu 22.04 LTS image
  source_image_reference {
    publisher = "Canonical"
    offer     = "0001-com-ubuntu-server-jammy"
    sku       = "22_04-lts"
    version   = "latest"
  }
}- Create a file named
output.tf:
output "public_ip" {
description = "The public IP address of the virtual machine"
value       = azurerm_public_ip.janak-azure.ip_address
}-
Create a file named
variables.tf:variable "azure_subscription_id" { type = string } variable "azure_client_id" { type = string } variable "azure_client_secret" { type = string } variable "azure_tenant_id" { type = string } -
Create a file named
terraform.tfvarsand replace your own keys:azure_subscription_id = "bf97eca7-bcbd-41ce-bc31-9c5d6fds84f2073" #subscription id azure_client_id = "2c6e5db5-620e-4b07-8b9a-904sfs45f297d41" #app registration azure_tenant_id = "69c13822-3598-4d4d-aae2-f142dsfs0ad786ab" #tenant id azure_client_secret = "UbB8Q~3GxAWrF67k1LdsdfvUzk72b2DBV~rgTkAkOaad" #secret value
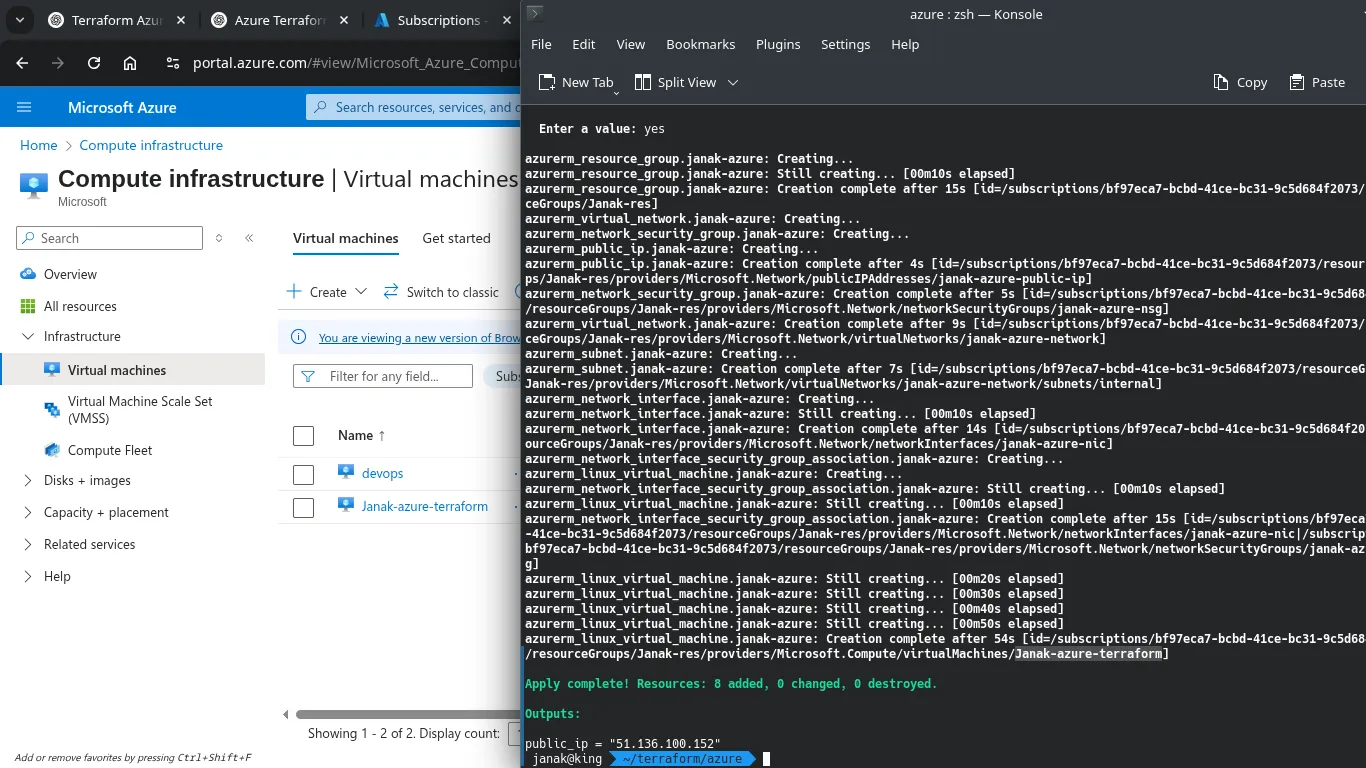
✅ Initialize and Apply Terraform
1. Initialize Terraform in your project directory:
terraform init2. Preview the actions Terraform will take:
terraform plan3. Apply the configuration:
terraform applyConfirm when prompted by typing yes.
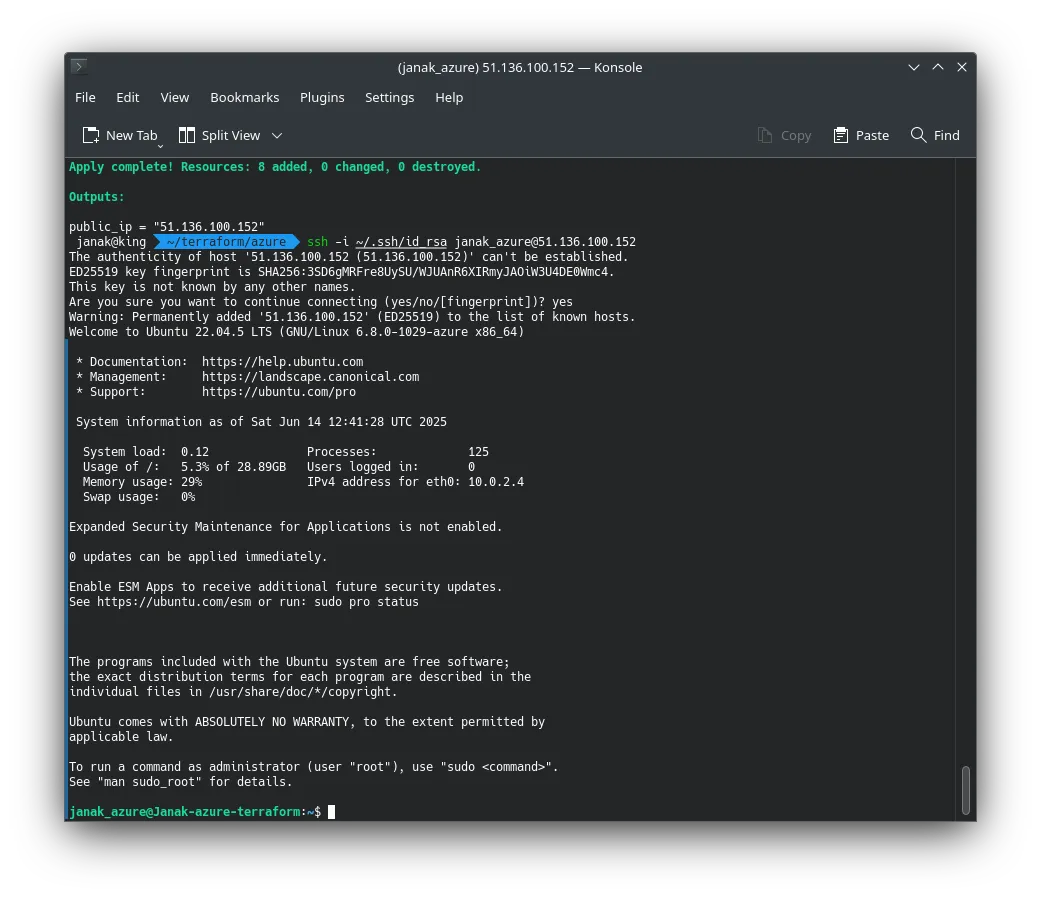
✅ SSH to newly created azure VM
ssh -i ~/.ssh/id_rsa [email protected]Use your own your USERNAME & IP
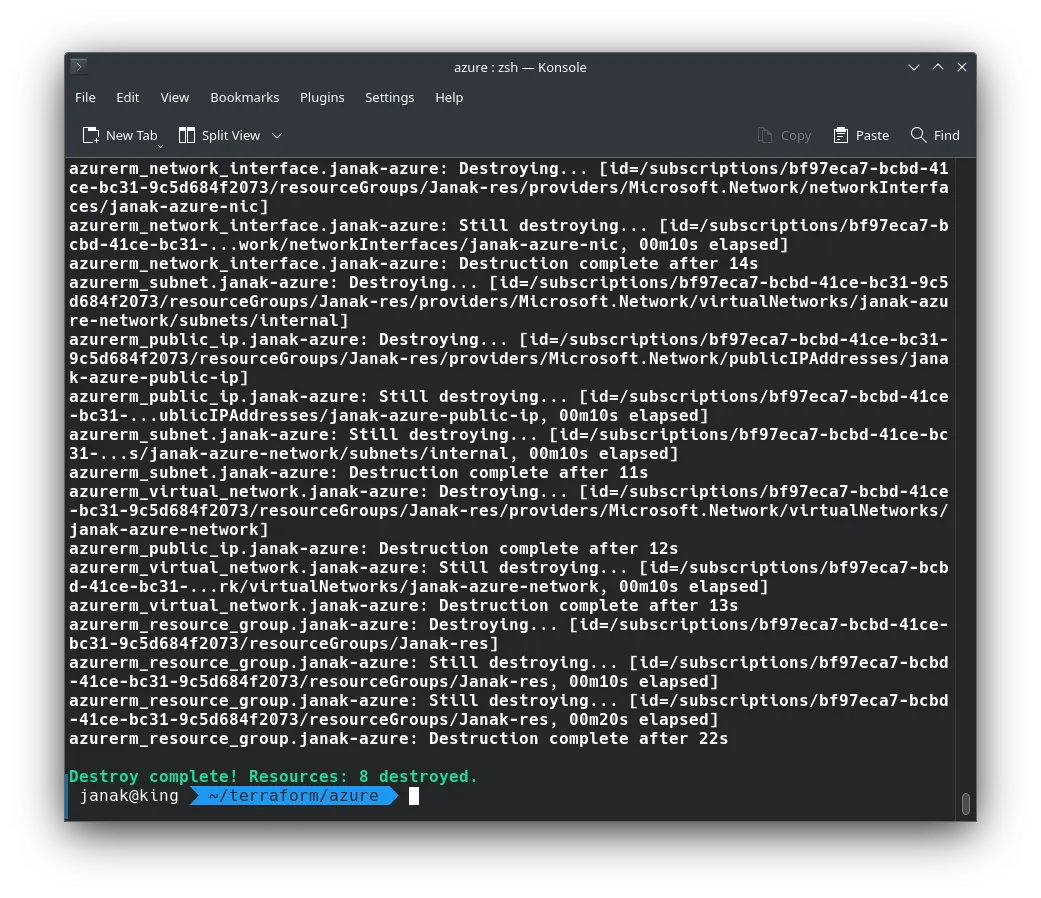
✅ Clean Up (To Save Free Credits)
When you’re done, destroy the resources:
terraform destroy