For Your Linux Virtual Machine (VM) running in VMware Workstation:
This is where the magic happens for consistent access. If you want your VM to always have the same IP address from the perspective of your host machine, or if you want it to be accessible consistently on the current local network you’re on, you should primarily use NAT networking in VMware Workstation.
A. VMware Network Adapter Setting for the VM: Use NAT (Network Address Translation)

- How it works: VMware Workstation creates a private virtual network (e.g.,
VMnet8by default) between your host machine and your VM. Your host acts as a router for the VM. The VM gets an IP address on this private virtual network, which does not change even if your host laptop’s public IP changes. - Benefits:
- The VM always gets Internet access through your host, regardless of which physical network your host is on.
- The VM’s IP address (within the NAT network) remains static and consistent from the host’s perspective.
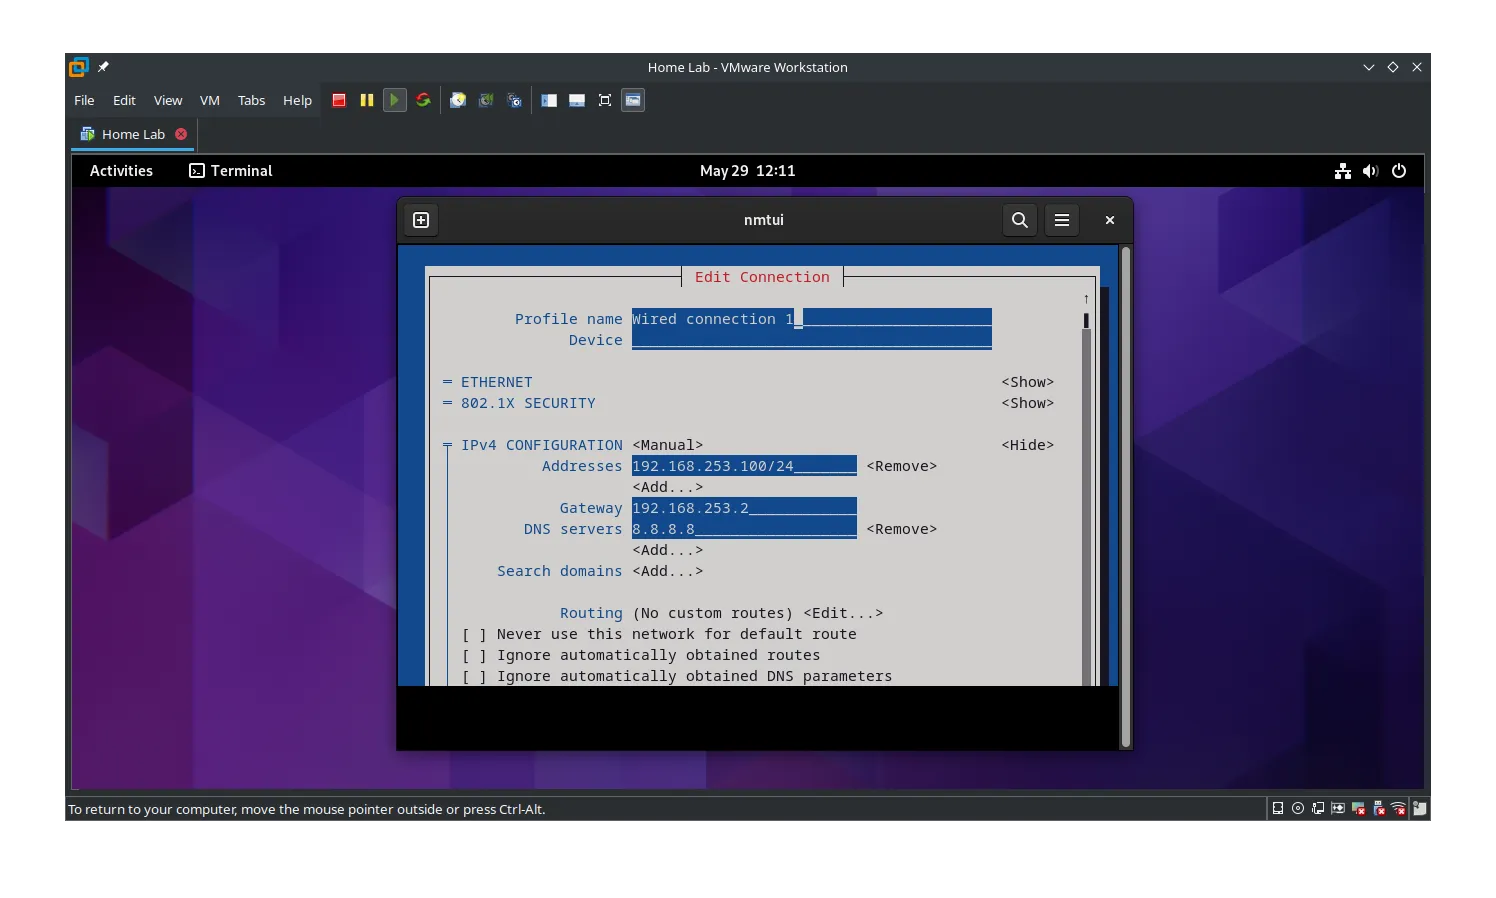
B. Static IP Configuration Inside the VM (using nmtui)
- Choose an IP within VMware’s NAT subnet:
- Go to Edit > Virtual Network Editor… in VMware Workstation.
- Select
VMnet8(NAT). - Note down the Subnet IP (e.g.,
192.168.100.0) and the Gateway IP (e.g.,192.168.100.2). - Choose a static IP for your VM within this range that is outside the DHCP range usually managed by VMware (e.g., if DHCP gives out from .128 to .254, pick something like
192.168.100.10).
- Use
nmtuiin your VM to set this static IP as previously instructed.- IP Address: Your chosen static IP (e.g.,
192.168.100.10/24) - Gateway: VMware’s NAT gateway (e.g.,
192.168.100.2) - DNS: You can use public DNS like
8.8.8.8(Google) or1.1.1.1(Cloudflare).
- IP Address: Your chosen static IP (e.g.,
C. Accessing the VM:
-
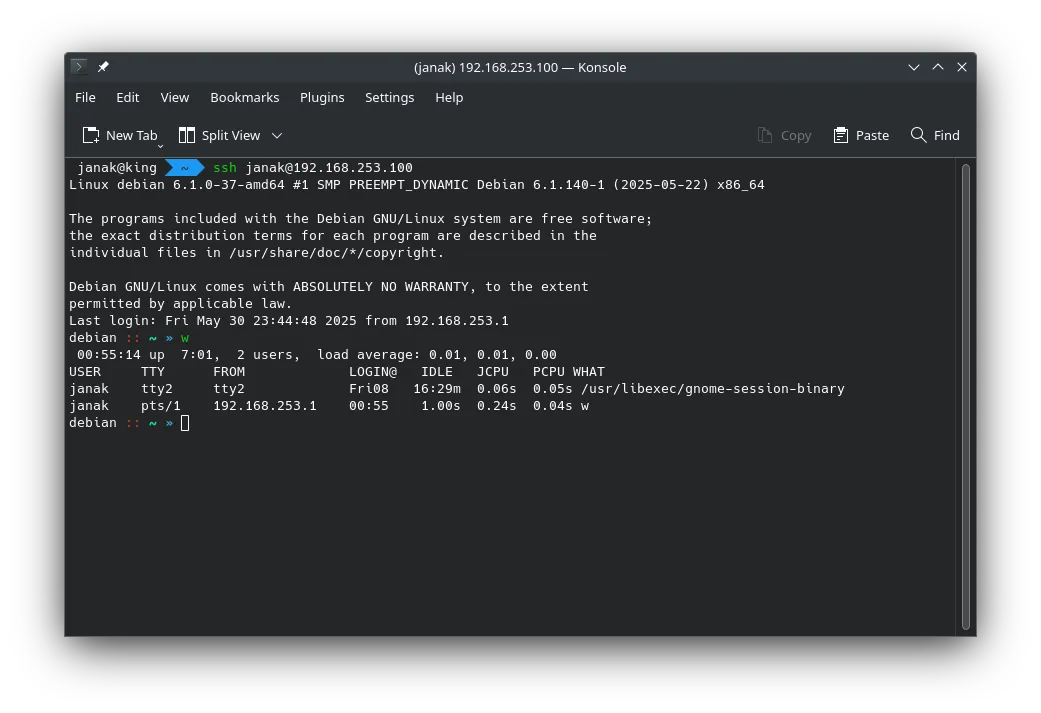
From your Host Laptop (most common): You will always connect to your VM using its static IP address within the NAT network.
- Example:
ssh [email protected] - This IP will never change, regardless of where your laptop is.
- Example:
-
From Other Devices on the Same Physical Network as your Laptop (e.g., another PC in your home network): This requires Port Forwarding on your Host Laptop (within VMware Workstation).
- In VMware Workstation, go to your VM’s Network Adapter settings (ensure it’s NAT).
- Click the “Port Forwarding” button (or similar in VMware Fusion/Workstation Pro, it’s usually under NAT settings in Virtual Network Editor).
- Add a rule:
- Host Port:
2222(or any other unused port on your host, not 22 to avoid conflicts) - Virtual Machine IP:
192.168.100.10(your VM’s static IP) - Virtual Machine Port:
22(or your service’s port, e.g.,3306for MySQL) - Protocol: TCP
- Host Port:
- Now, from another device on your local network, you would connect to your Host Laptop’s current IP address on the Host Port you just configured.
- Example: If your laptop’s current Wi-Fi IP is
192.168.1.50, then from another PC:ssh [email protected] -p 2222
- Example: If your laptop’s current Wi-Fi IP is
- The downside: Your laptop’s
192.168.1.50IP will change when you move networks. So, you’d need to find your laptop’s current IP each time if you want to connect from other local devices.