Django Todo App Deployment - EC2, Virtual Environments, and Docker
guiding you through deploying your Django todo app on an AWS EC2 instance, covering both traditional virtual environment setup and containerization with Docker.
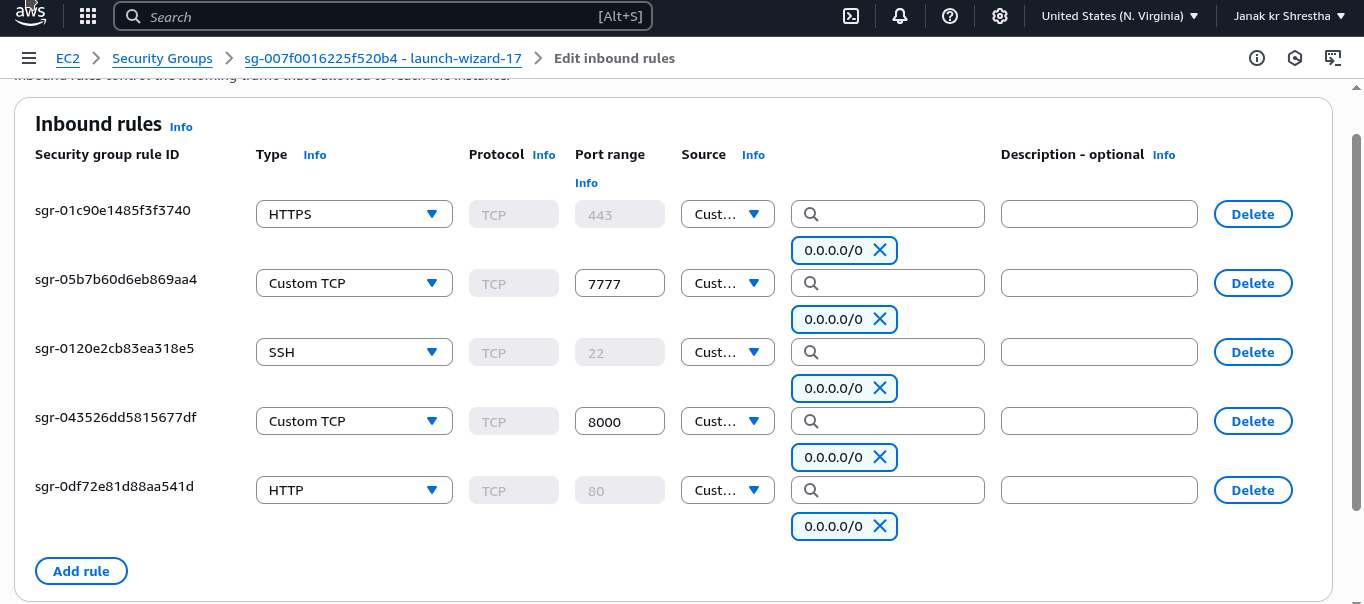
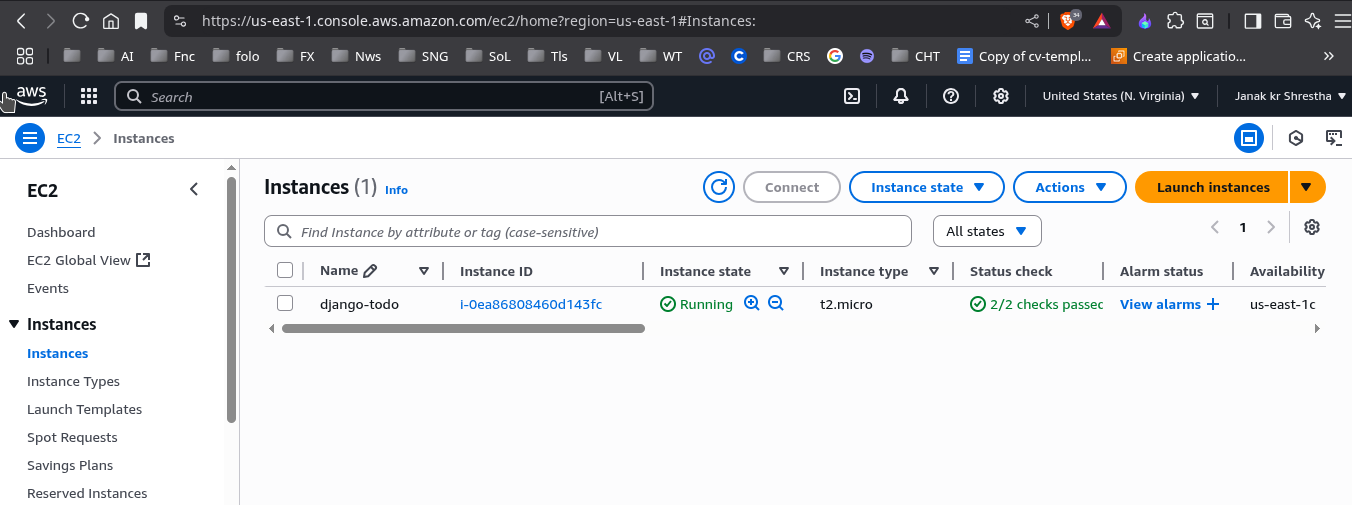
Add 2 Inbound rule to your EC2 instance.
- Rule: Custom TCP (Port 8000/7777): We’ll use this temporarily for testing the Django development server or Docker.
- Type:
Custom TCP - Port range:
8000(for virtual env testing) and7777(for Docker testing). - Source type:
Anywhere
- Type:
1. Connect to Your EC2 Instance via SSH
1
  ssh -i ~/.ssh/aws-janak.pem  [email protected]
2. Prepare the EC2 Server Environment
Once connected via SSH to your EC2 instance:
Update System Packages:
1
2
sudo apt update
sudo apt upgrade -y
Install Essential Software:
1
sudo apt install python3.13 python3.13-venv -y
python3.13-venv: For creating isolated Python environments.
Deploying with a Python Virtual Environment 🐍
1. Clone Your Django Project
1
2
  git clone https://github.com/shreys7/django-todo.git
  cd django-todo
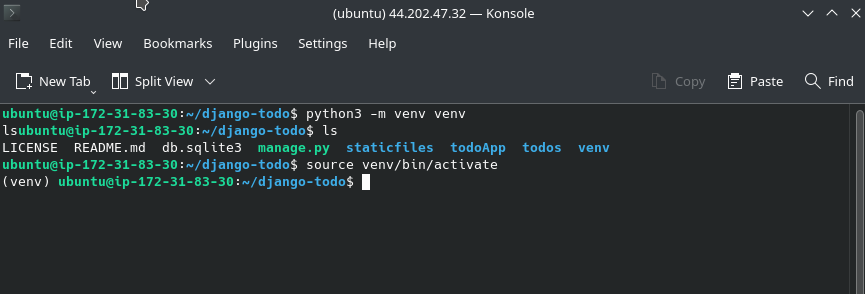
2. Create and Activate Virtual Environment (on EC2)
- Create:
1
python3 -m venv venv - Activate:
1
source venv/bin/activate
Your prompt should now show
(venv)at the beginning, indicating the virtual environment is active.
If you want to Deactivate the current virtual environment(Dont do)
1
deactivate
Ensure (venv) disappears from your prompt.
3. Configure Django Settings
Install Core Django:
1
  pip install django
You need to tell Django about your EC2 instance’s public IP and prepare it for a production-like environment.
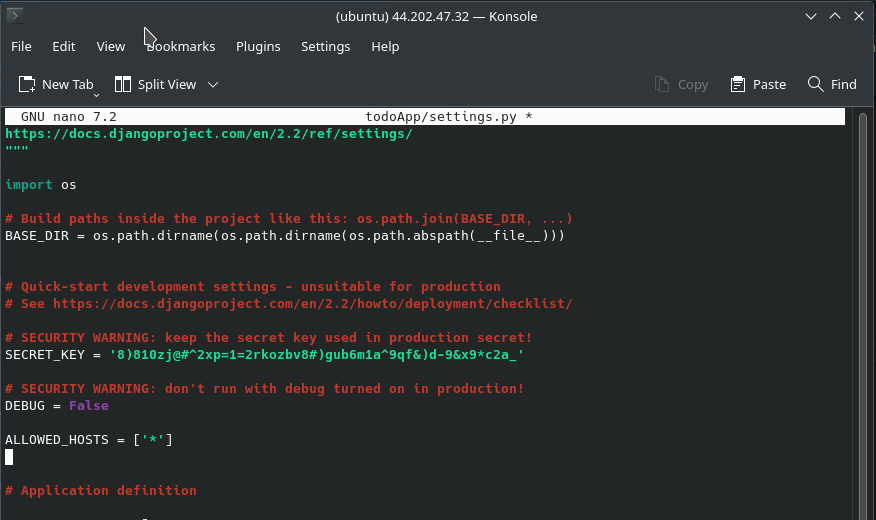
- Open
settings.py:1
nano todoApp/settings.py
- Set
DEBUG = False: Never run withDEBUG = Truein production! It exposes sensitive information. - Add your EC2 Public IP to
ALLOWED_HOSTS: FindALLOWED_HOSTS = []and add your instance’s public IP.1 2
ALLOWED_HOSTS = ['44.202.47.32'] # Example for all: ALLOWED_HOSTS = ['*']
If you get a domain name later, add it here too:
['your_instance_public_ip', 'your-domain.com']. - Configure
STATIC_ROOT: Ensure these lines are present (addimport osat the top if missing):1 2
import os # ... other settings ...
- Save and Exit: Press
Ctrl+X, thenY, thenEnter.
6. Prepare Database and Static Files
- Collect Static Files:
1
python3 manage.py collectstatic
Type
yeswhen prompted. This gathers all static assets (CSS, JS, images) into thestaticfilesfolder. - Apply Migrations:
1 2
python3 manage.py makemigrations # Only needed if you made model changes python3 manage.py migrate - Create Superuser:
1
python3 manage.py createsuperuser
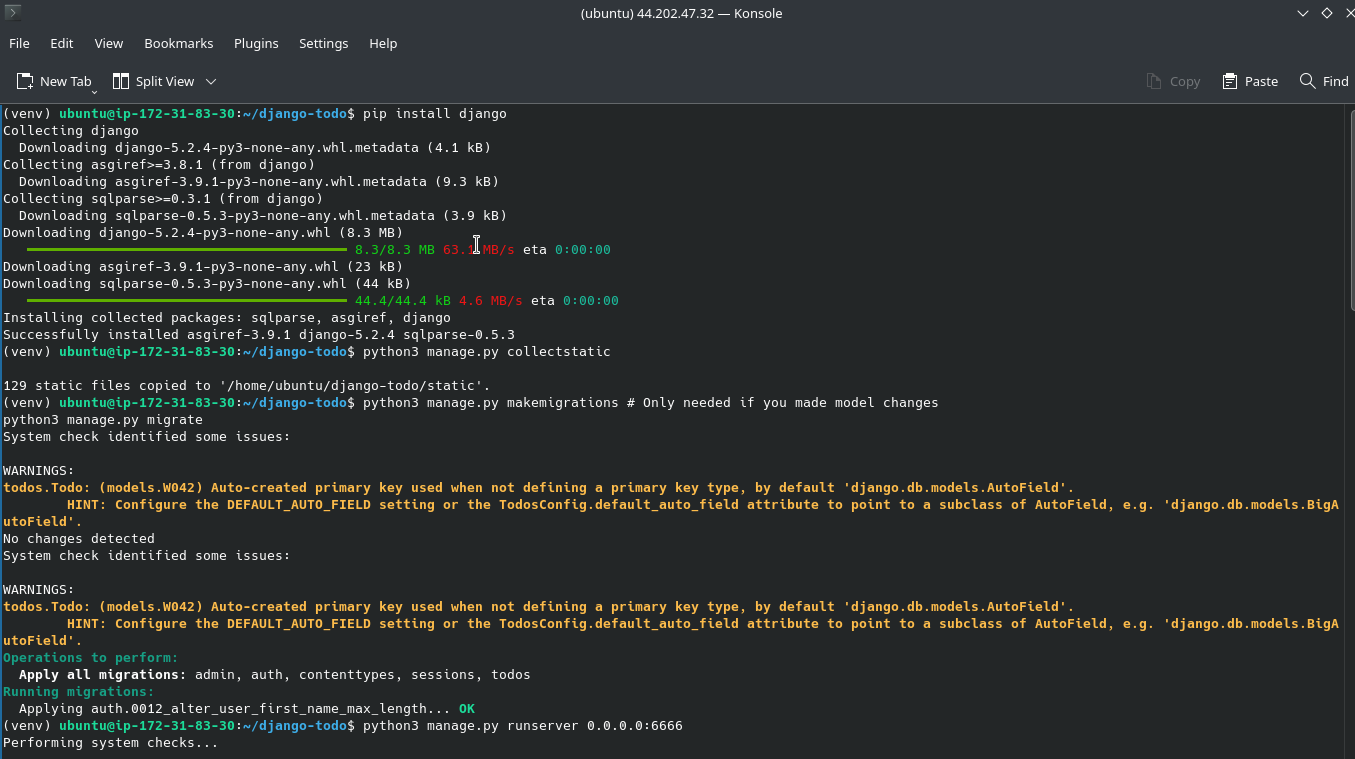
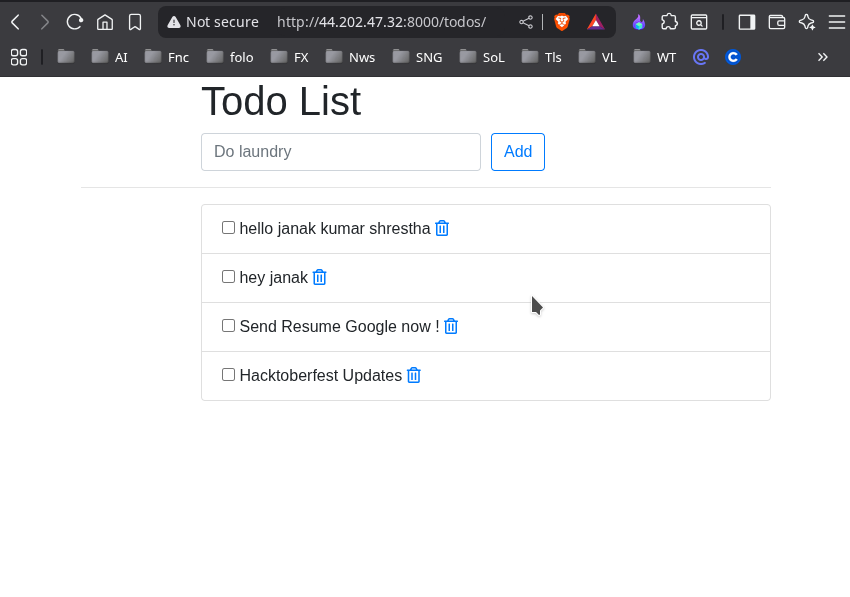
7. Test with Django’s Development Server
This is just to confirm your app runs before setting up production servers.
- Run the server:
1
python3 manage.py runserver 0.0.0.0:8000
You’ll see warnings about it being a development server, which is expected.
- Access in browser: Open your browser and go to
http://44.202.47.32:8000/. If you get aDisallowedHosterror, double-check that your EC2 Public IP is correctly added toALLOWED_HOSTSinsettings.py. Make sure Port 8000 is open in your EC2 instance’s Inbound Security Group.
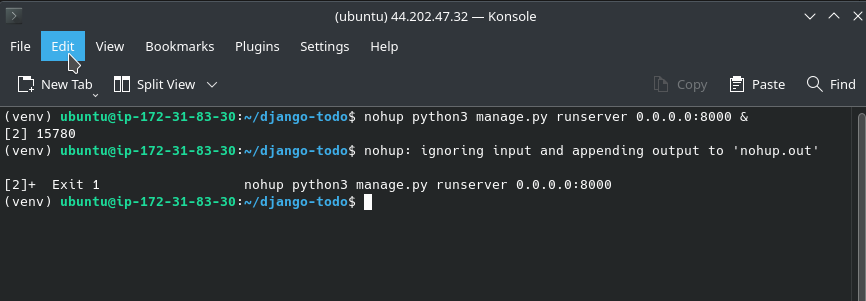
8. Run in Background with nohup (Temporary)
To keep the development server running even after you close your SSH session:
- Stop the current
runserver(if running) by pressingCtrl+C. - Run with
nohup:1
nohup python3 manage.py runserver 0.0.0.0:8000 &You’ll see a message about output being redirected to
nohup.out. You can check it withtail -f nohup.out. To stop it later:ps aux | grep 'runserver' | grep -v 'grep'to find the PID, thenkill <PID>.
Part 3: Containerizing with Docker
Docker provides a consistent and isolated environment for your app, making deployments more reliable.
1. Create Dockerfile and .dockerignore
- Your
.dockerignorefile should exclude unnecessary files likevenv/,__pycache__/,.git/,db.sqlite3, etc.# .dockerignore venv/ __pycache__/ *.pyc .git/ .gitignore .DS_Store nohup.out db.sqlite3 - Your
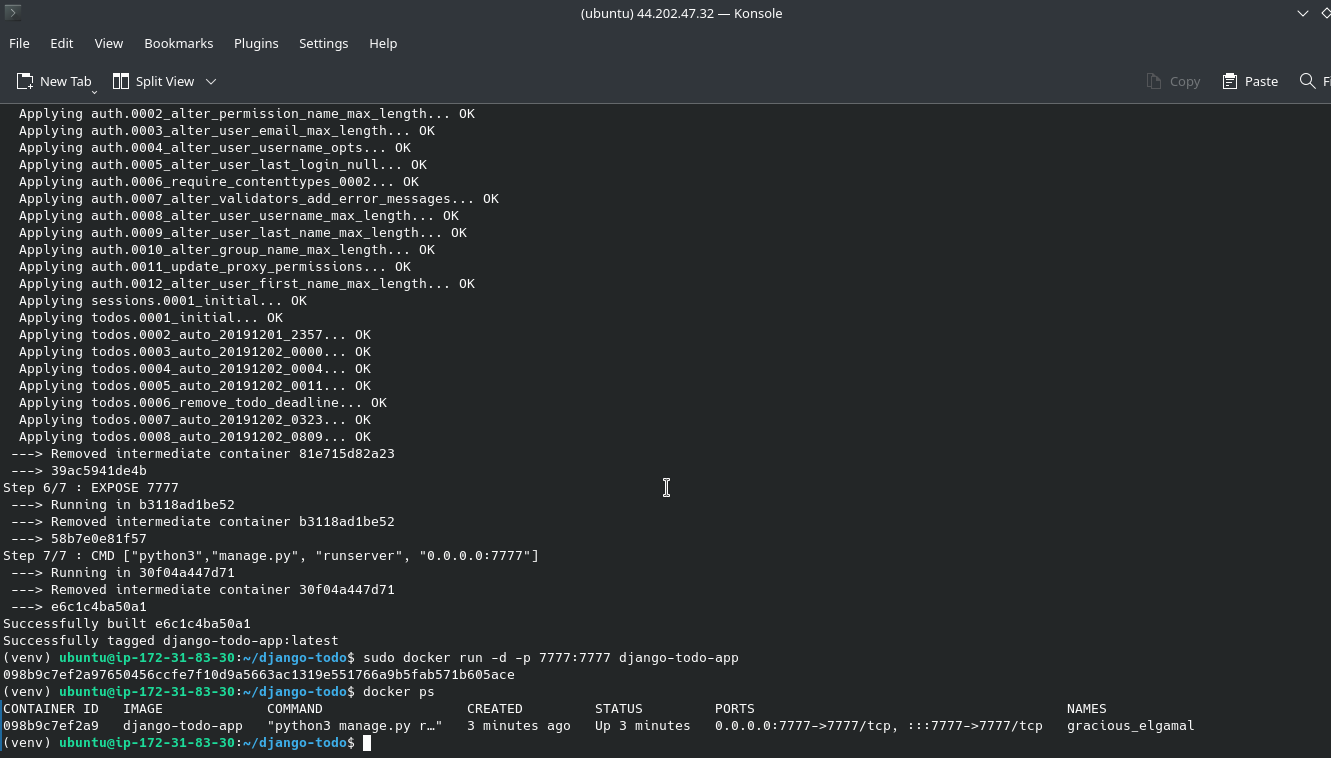
Dockerfileshould look something like this (you’ve already confirmed you have it):1 2 3 4 5 6 7 8 9 10 11 12 13 14 15 16 17 18 19 20 21 22
# Use an official Python runtime as a parent image FROM python:3 # Set the working directory in the container WORKDIR /app # Install Django (ideally from requirements.txt, but using direct install for this example) RUN pip install django==5.2.4 # Copy the entire Django project into the container # The .dockerignore file will prevent unwanted files like 'venv/' from being copied COPY . . # Run database migrations RUN python3 manage.py migrate # Expose the port that the Django development server will listen on EXPOSE 7777 # Define the command to run the application # We'll use port 8001 for the Dockerized version to distinguish it CMD ["python3","manage.py", "runserver", "0.0.0.0:7777"]
2. Build the Docker Image
On your EC2 instance, in your project’s root:
1
sudo docker build -t django-todo-app .
- This command reads your
Dockerfileand creates a Docker image nameddjango-todo-app.
3. Run the Docker Container
To run your app in a Docker container in the background:
1
sudo docker run -d -p 7777:7777 django-todo-app
-d: Runs the container in “detached” (background) mode.-p 7777:7777: Maps port 8001 on your EC2 instance (host) to port 8001 inside the container.
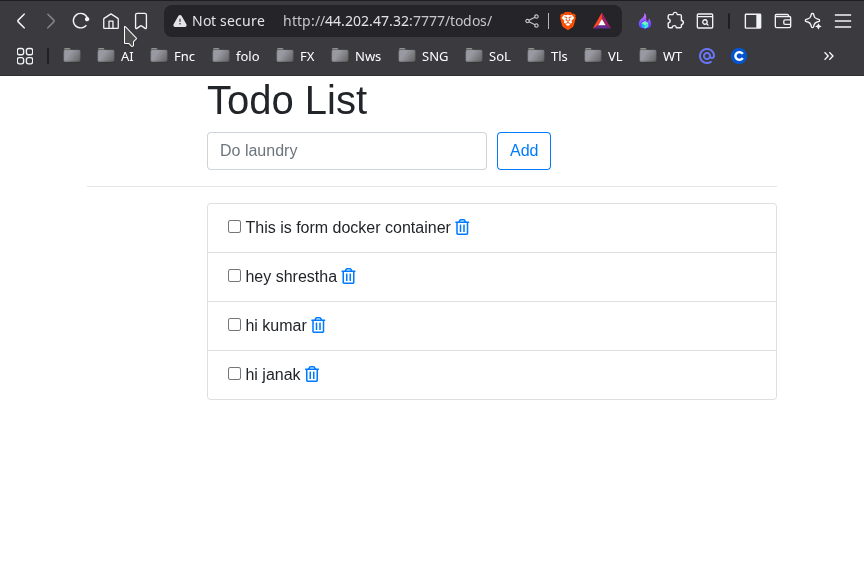
4. Verify and Access Your Dockerized App
- Check if the container is running:
1
sudo docker ps
You should see your
django-todo-appcontainer listed with aStatusof “Up…”.
- Access in browser: Ensure Port 8001 is open in your EC2 Security Group. Then, open your web browser and go to
http://44.202.47.32:7777/todos/.
Prepare Your Local Project for Deployment
- Generate
requirements.txt(on your LOCAL machine):- Navigate to your project’s root on your local machine.
- If you have a local virtual environment, activate it.
- Run:
1
pip freeze > requirements.txt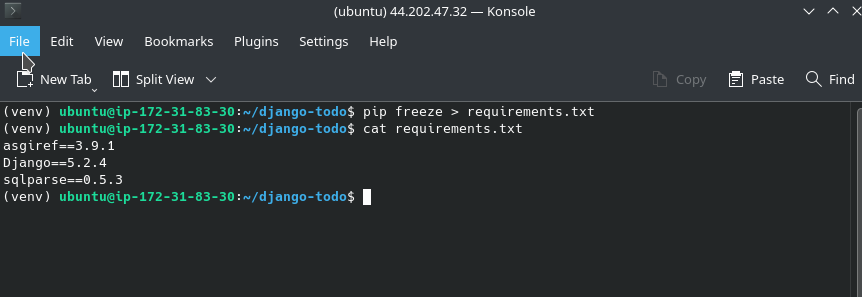
Install Dependencies
- Install from
requirements.txt:1
pip install -r requirements.txt
If
pipcommand doesn’t work directly (e.g.,Command 'pip' not found), usepython3 -m pip install -r requirements.txtinstead. —–
What’s Next for Production?
While your app is now accessible, remember the warnings about using the Django development server. For a truly production-ready setup, you would:
- Replace
runserverwith Gunicorn: Update yourDockerfile’sCMDto use Gunicorn. - Implement Nginx as a Reverse Proxy: Configure Nginx on your EC2 instance to serve static files directly and forward dynamic requests to Gunicorn. This is crucial for performance and security.
- Use a Production Database: Migrate from SQLite to a robust database like PostgreSQL, ideally using AWS RDS for managed services.
- Set up HTTPS (SSL/TLS): Secure your application with an SSL certificate (e.g., using Certbot with Let’s Encrypt).
- Environment Variables: Store sensitive data (like Django’s
SECRET_KEY, database credentials) using environment variables or AWS Secrets Manager, not directly insettings.py.