Automate Your Deployment: Publicly Hosting a Static Website on AWS S3 with GitHub Actions CI/CD
Deploying a website shouldn’t be a tedious manual task. By setting up a Continuous Integration/Continuous Deployment (CI/CD) pipeline using GitHub Actions and AWS S3, you can automate the entire process, pushing changes live whenever you commit code.
Step 1: Your Project Structure and Repository Setup
Your project is structured cleanly with all website files located in the root directory. This simplifies the deployment command.

Step 2: Configure AWS S3 for Static Hosting
We need a destination for your website files and a policy that grants public access.
- Create an S3 Bucket: Create a new S3 bucket (e.g.,
demo-cicd-janak). Choose a region (e.g.,us-east-1). - Enable Static Website Hosting:
- Go to the bucket’s Properties tab.
- Under Static website hosting, choose Enable.
- Set both Index document and Error document to
index.html(or your preferred file).
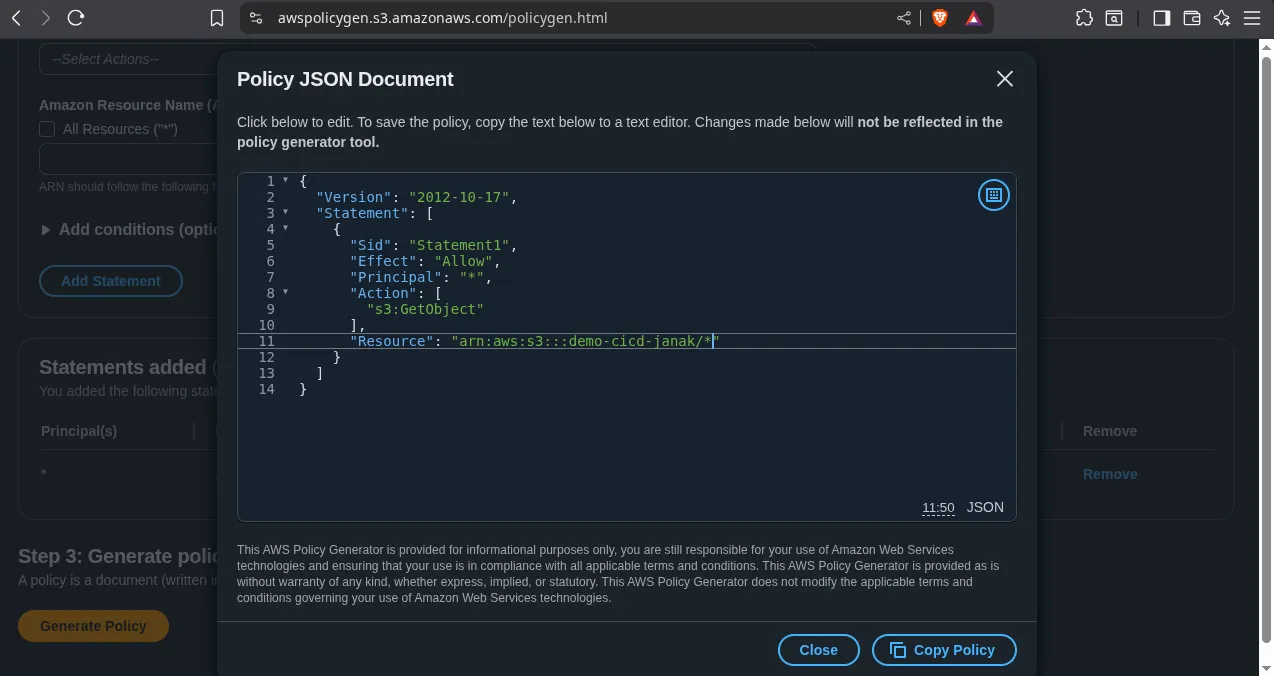
- Set Bucket Policy (Grant Public Read Access) using the AWS Policy Generator:
- Navigate to the AWS Policy Generator tool online.
- Type of Policy:
S3 Bucket Policy - Effect:
Allow - Principal:
*(Public access) - AWS Service:
Amazon S3 - Actions: Select
GetObject(s3:GetObject) - Amazon Resource Name (ARN): Enter the ARN for all objects in your bucket:
arn:aws:s3:::YOUR_BUCKET_NAME/* - Click Add Statement, then Generate Policy.
- Copy the generated JSON code and paste it into the Permissions tab > Bucket policy section of your S3 bucket.
CRITICAL: Ensure the “Block public access (bucket settings)” is turned OFF for your bucket to be publicly accessible.
Step 3: Secure GitHub with AWS Credentials
We will use GitHub Secrets to securely store your AWS Access Keys, allowing the workflow to authenticate.
- Create IAM Credentials: In your AWS account, create a dedicated IAM User with programmatic access. Attach a policy granting
s3:GetObject,s3:PutObject,s3:DeleteObject, ands3:ListBucketpermissions limited to your deployment bucket. - Add Secrets to GitHub:
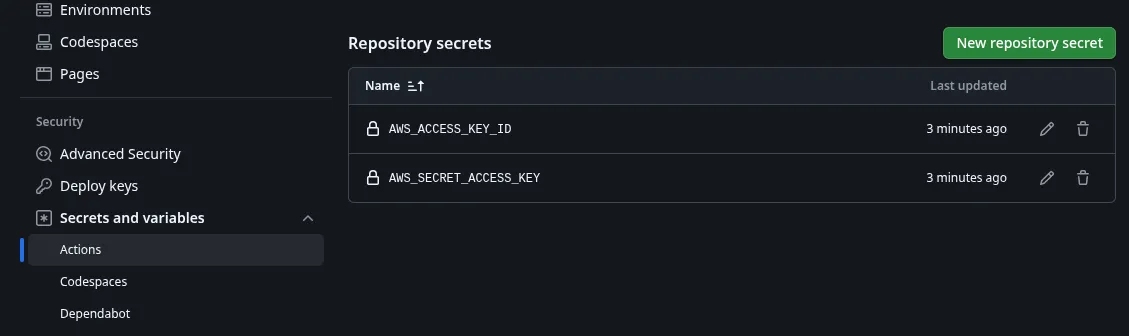
- Navigate to your GitHub Repository Settings.
- Go to Secrets and variables > Actions.
- Add two new repository secrets:
- Name:
AWS_ACCESS_KEY_ID - Value: (Your IAM Access Key ID)
- Name:
AWS_SECRET_ACCESS_KEY - Value: (Your IAM Secret Access Key)
- Name:
Step 4: Create the CI/CD Workflow (main.yml)
The workflow file lives at .github/workflows/main.yml. This YAML configuration defines the steps to deploy your repository’s content to S3. We use the latest action versions to avoid deprecation warnings.
# .github/workflows/main.yml

name: Deploy Static Website to S3

on:
  push:
    branches:
      - main

jobs:
  deploy:
    runs-on: ubuntu-latest
    steps:
      - name: Checkout repository code
        # Use the latest stable version
        uses: actions/checkout@v4

      - name: Configure AWS Credentials
        # Use the latest stable version
        uses: aws-actions/configure-aws-credentials@v4
        with:
          aws-access-key-id: ${{ secrets.AWS_ACCESS_KEY_ID }}
          aws-secret-access-key: ${{ secrets.AWS_SECRET_ACCESS_KEY }}
          # IMPORTANT: Use the region where your S3 bucket is located
          aws-region: us-east-1

      - name: Deploy root files to S3 bucket
        # Sync the entire root directory ('.') to the S3 bucket
        run: aws s3 sync . s3://YOUR_S3_BUCKET_NAME --delete
Sync Command Explained:
aws s3 sync . s3://YOUR_S3_BUCKET_NAME --delete
- The dot (
.) represents the root of your checked-out repository, deploying files likeindex.htmldirectly to the S3 root.--deleteensures that files you remove from Git are also deleted from your live S3 bucket.
Step 5: Push and Monitor the Deployment
Commit and push your new .github/workflows/main.yml file to the main branch.
- Open your terminal in the project root:
git add . git commit -m "Added GitHub Actions CI/CD workflow" git push -u origin main - Go to your GitHub repository and click the Actions tab. You will see the
Deploy Static Website to S3workflow running.
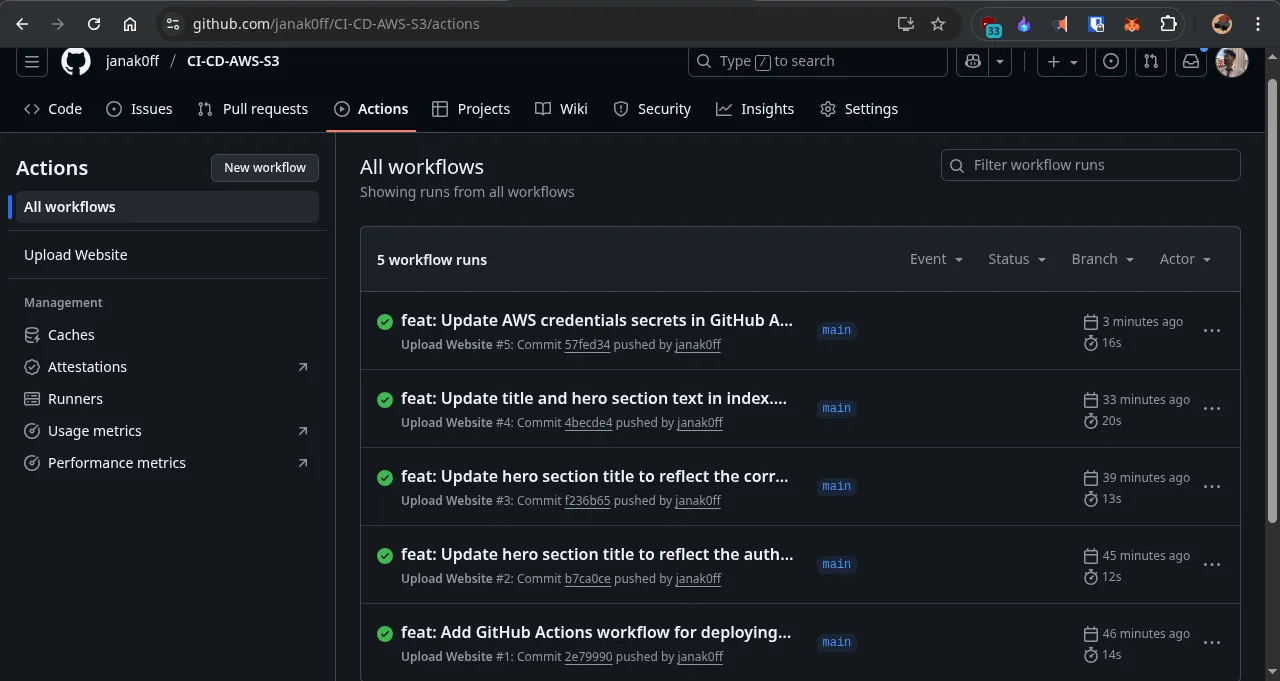
- Once the workflow status turns green (Success), go to your S3 bucket’s Properties and click the Endpoint URL under Static website hosting.
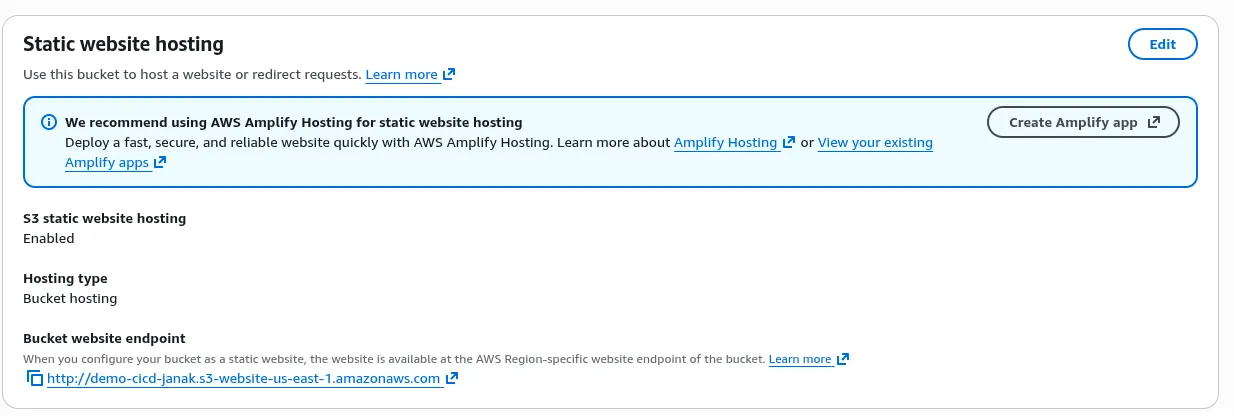
Your static website is now live! Every subsequent git push will automatically trigger this pipeline, keeping your site perpetually synchronized.